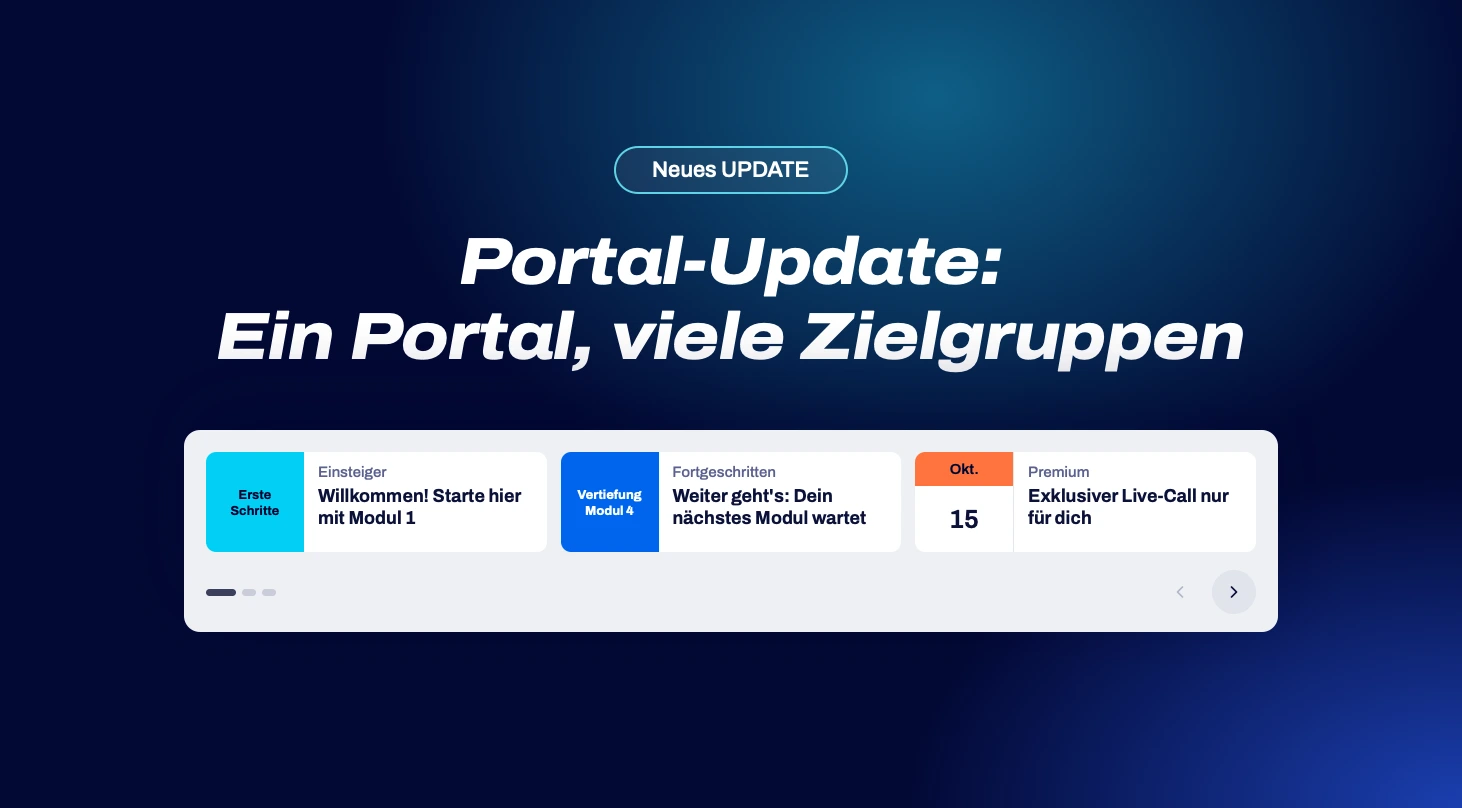
Your members are all different. Some are just getting started, while others have been with you for a long time. Some have signed up for your introductory course, while others have enrolled in your premium program. Even so, until now, everyone has seen the same home page. That’s about to change.
Since August, we've been expanding the Portal Builder step by step. You can now specify who should be able to view each section of your portal based on access permissions, information in the member profile, or a specific date.
This transforms a single homepage for everyone into a homepage tailored to each member.
The visibility rules are available in all plans. Rules based on access do not require attributes. For rules based on attributes and date, you need member attributes, and the number you can create depends on your plan: Starter 3, Grow 5, Scale unlimited. Attributes are not available in the Free plan.
In a nutshell
- Show or hide portal sections based on the member, using conditions based on access or attributes
- Combining Conditions with "AND" or "OR"
- Exclusive groups with priorities set via drag-and-drop: Each member sees exactly one suitable option
- New attribute types (drop-down list and date field) and an attribute form as a lesson
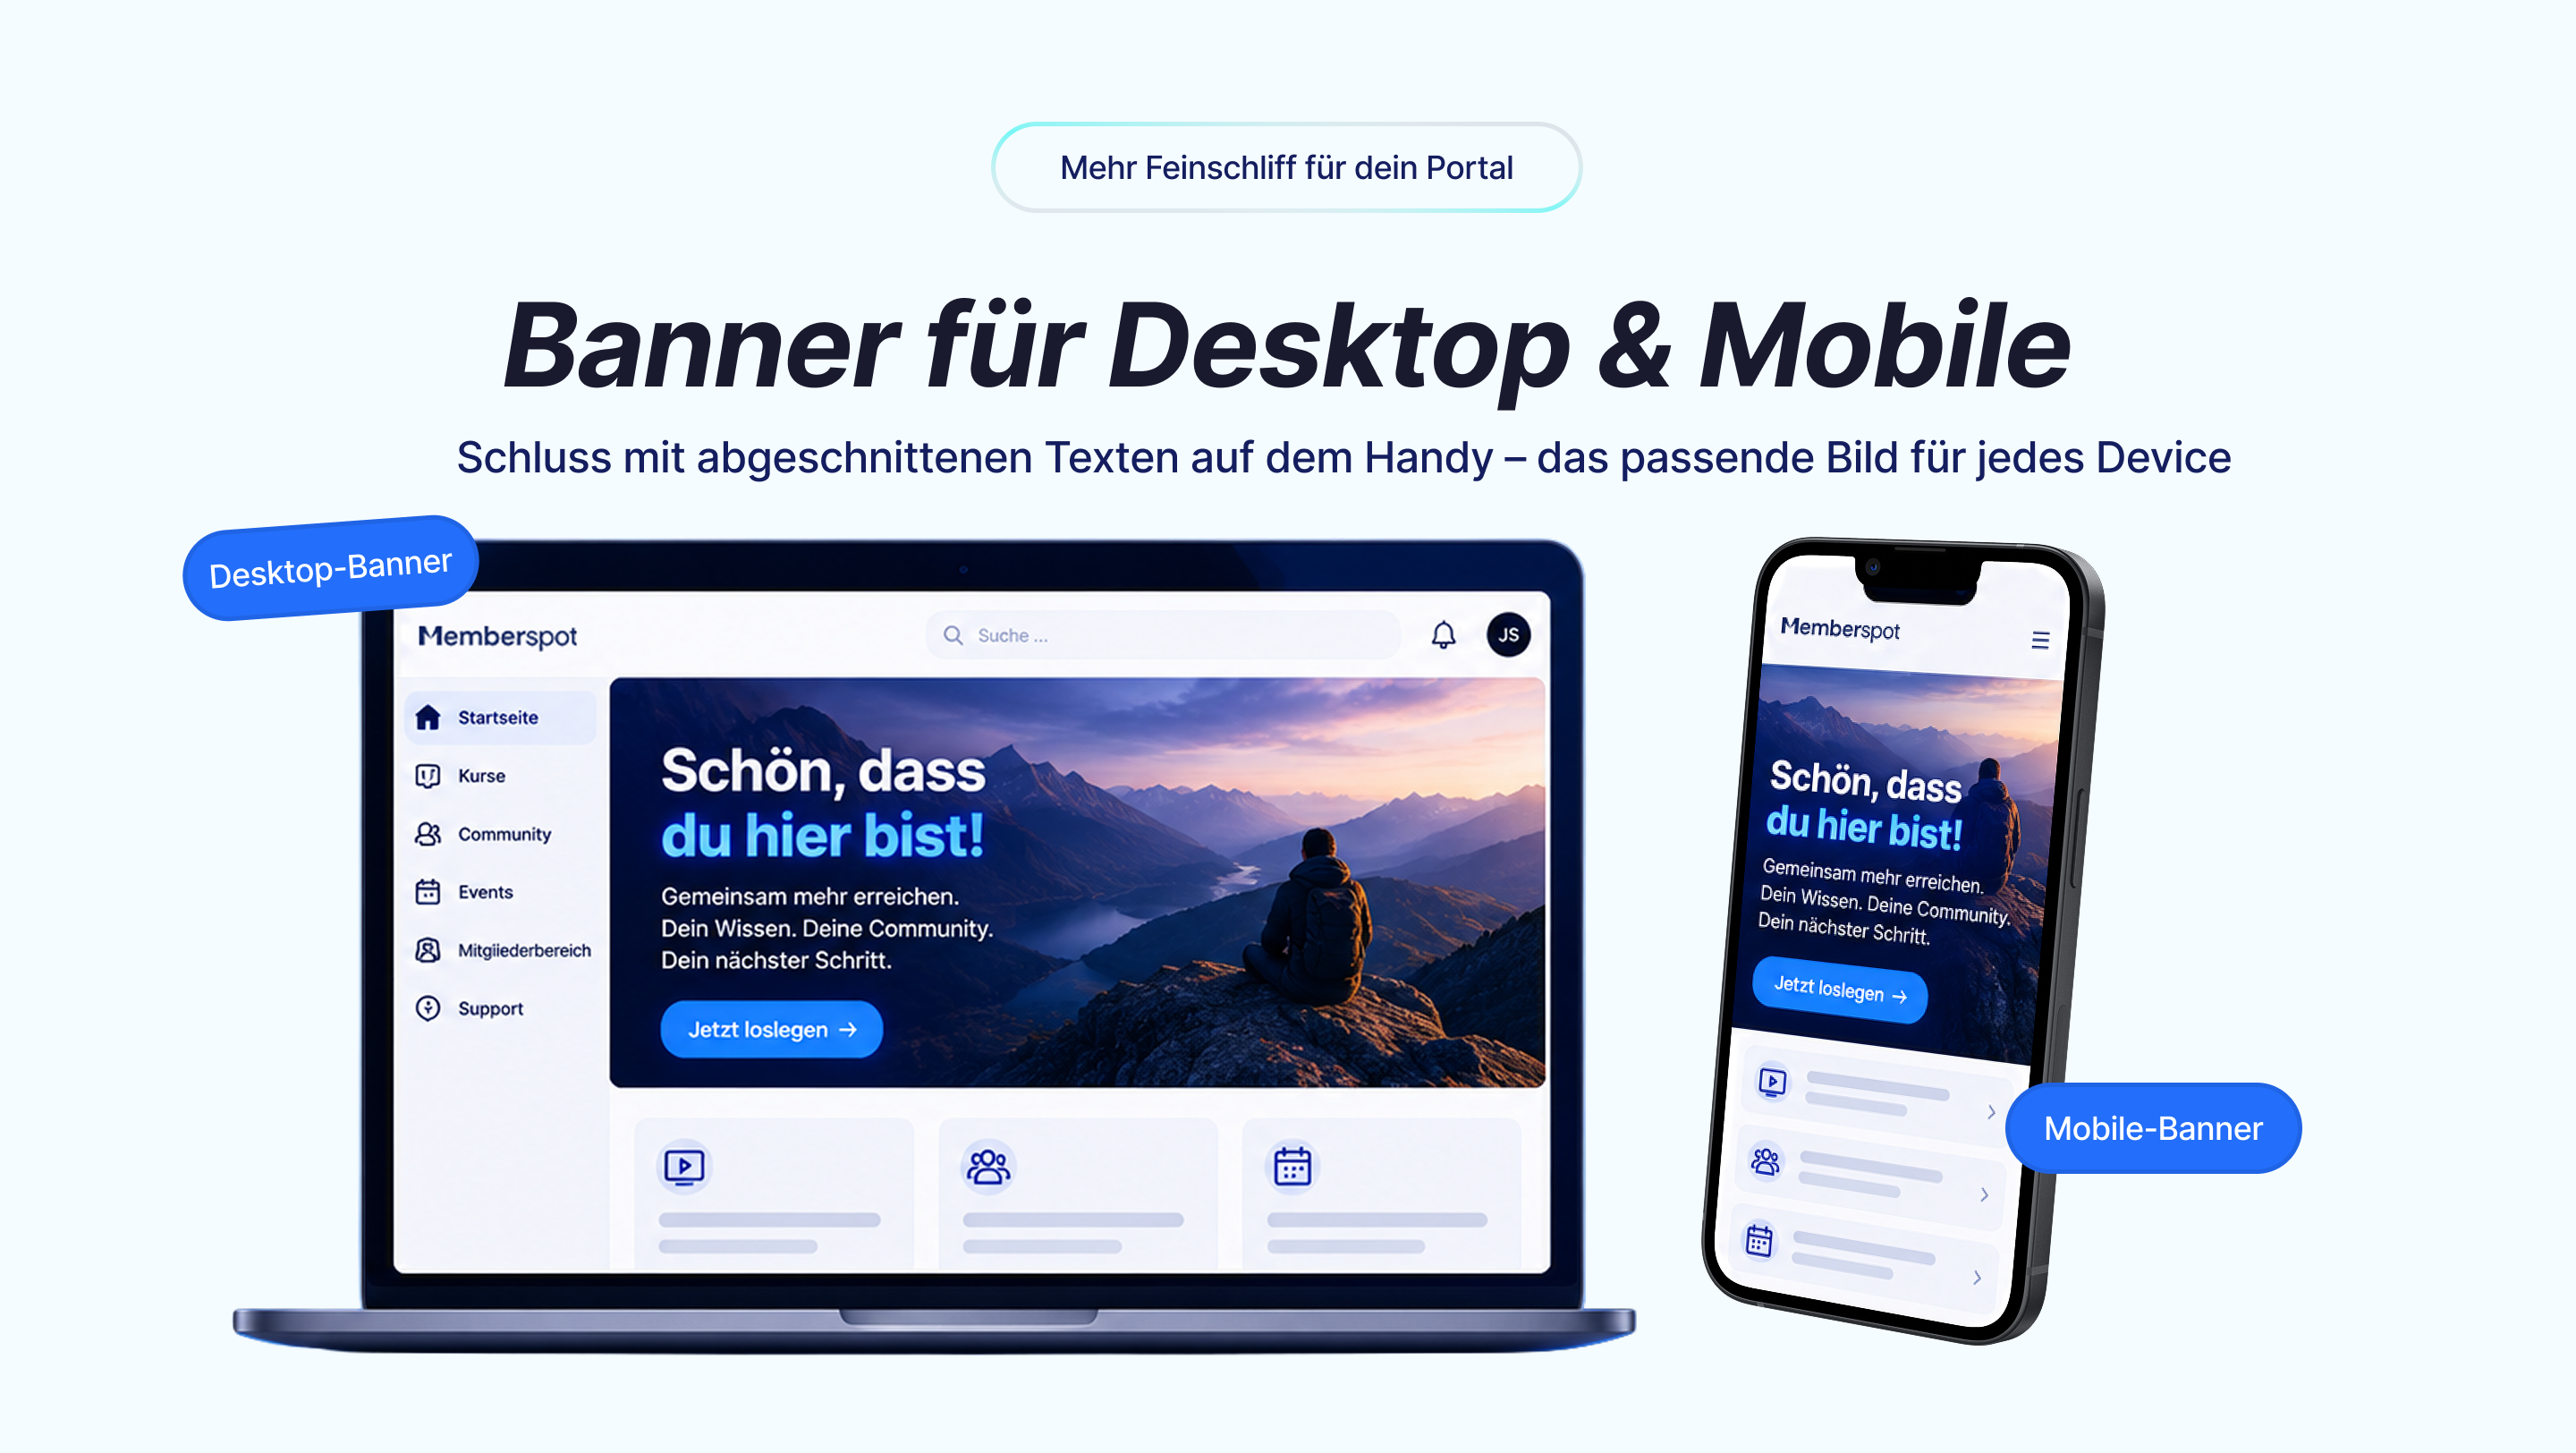
- Separate banners for desktop and mobile, portal icons in the side menu
What's New?
The portal is the first thing your members see after logging in. This is exactly where it’s decided whether they feel welcomed right away or have to search for things first.
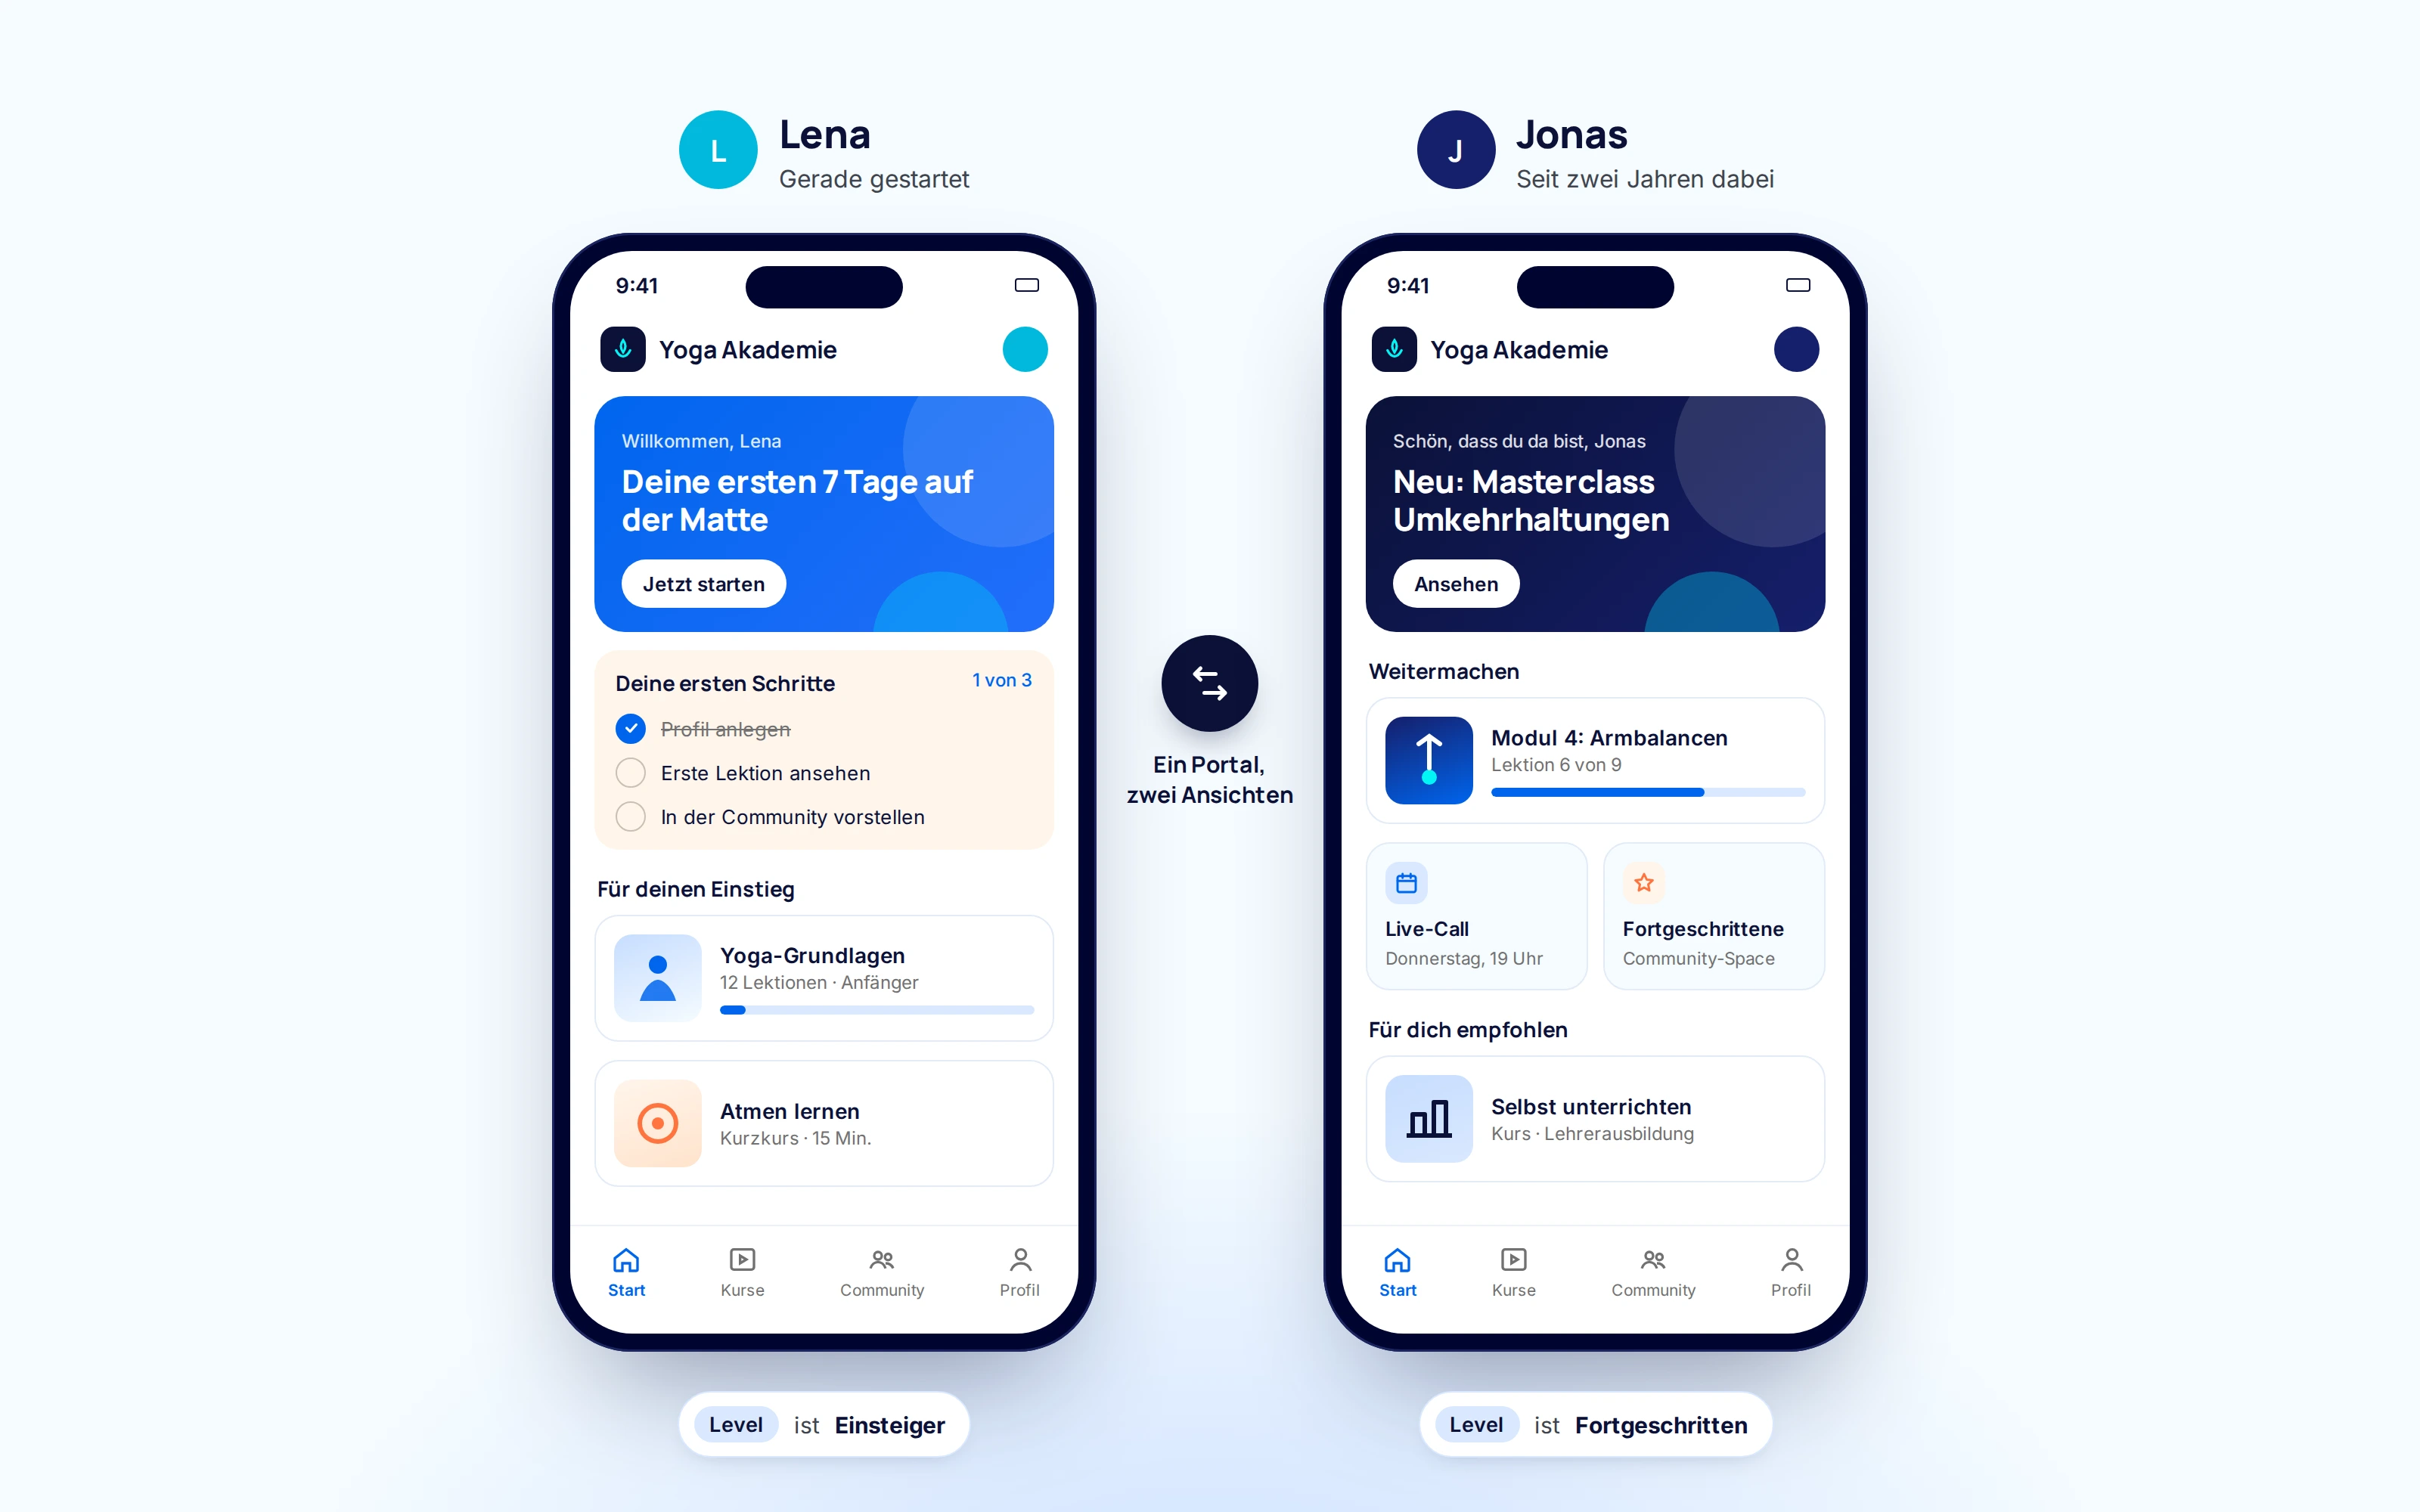
With the new visibility rules, you can show each member the content that’s most relevant to them right now. Newcomers see the “Getting Started” course at the top, while advanced users see the in-depth modules. Customers of your premium plan get their own section with live calls; everyone else sees a prompt to upgrade there.
The big difference: Instead of building multiple portals for different target audiences, you maintain a single portal that adapts to each member.
Set Visibility by Section
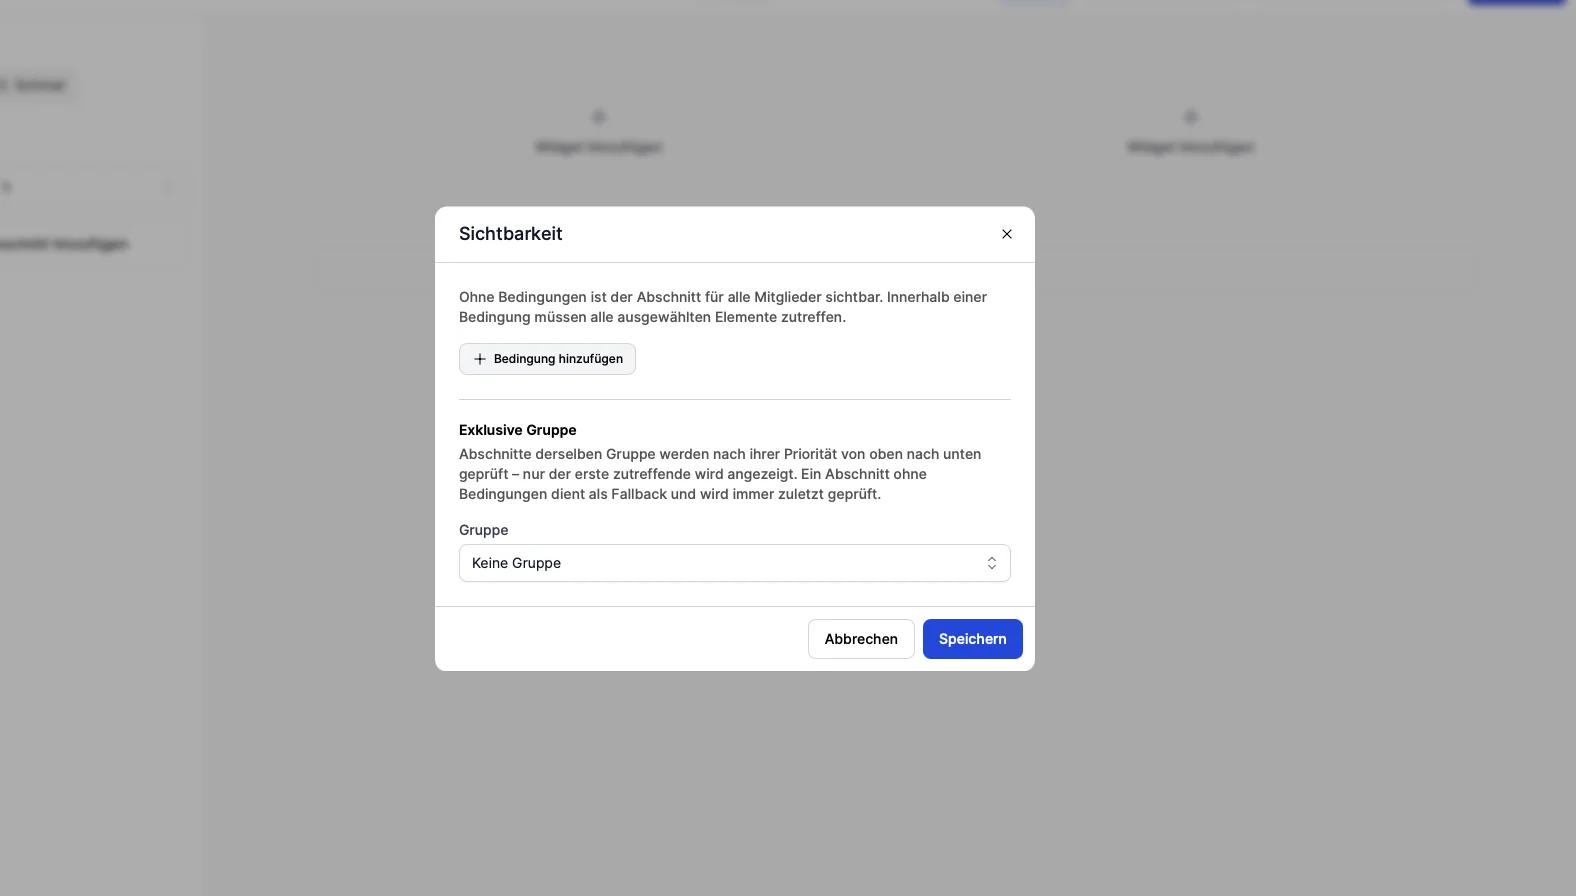
You can set conditions for each section in your portal. The section will only be displayed if a member meets those conditions. If they do not meet them, the entire section—including its content—will disappear.
You can set conditions based on two things:
- Access: The member has access to a specific course, space, portal, or offering (or does not).
- Attribute: A specific value is stored in the member's profile, such as "Level is Advanced." For date attributes, you also check whether the date is in the past or in the future.
You can link multiple conditions using "AND " or "OR." With "AND," all conditions must be met, such as "has access to the Premium Program AND is at the Advanced level." With "OR," meeting one condition is sufficient, such as "has access to Course A OR Course B." Within a section, either "AND" or "OR" applies to all conditions. Nested combinations such as "(A and B) or C" are not allowed.
Important: The rules control what is displayed in the portal. They do not block content. Anyone who accesses a course or space via a direct link and has permission can still open it. If you really want to protect content, use access permissions as you have in the past.
Time-Dependent Content with Date Attributes
With a date attribute, you can control content based on a specific date, such as the start of a program or the end of a member's contract. For example, you can display a countdown notification before the program starts and then show the course overview afterward, or you can remind members about renewal shortly before their contract ends.
There are two things you should know about this:
- The comparison is made on the exact day. On that day itself, it is considered neither the past nor the future.
- If a member has not yet entered a date, neither “in the past” nor “in the future” applies. Plan for a fallback section (more on this below) so that nothing simply appears there.
Member Attributes: The Foundation for Your Target Audiences
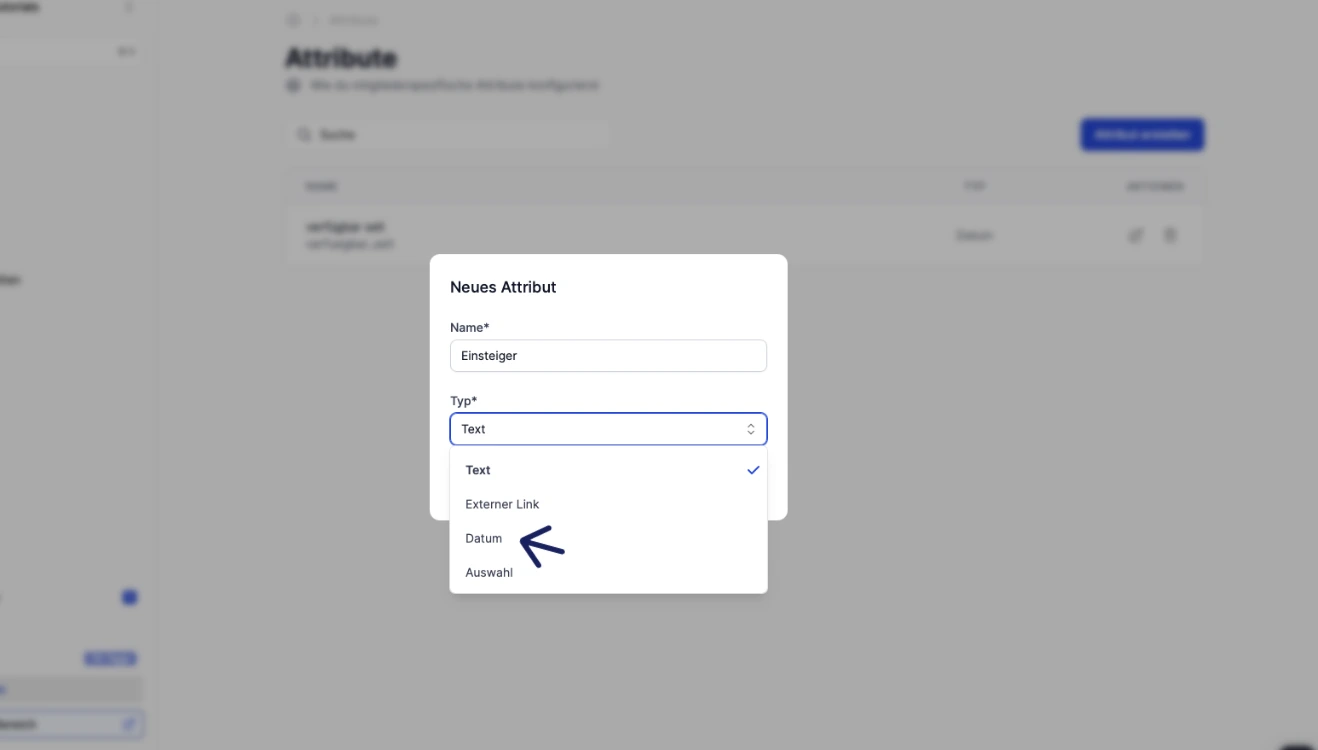
Attributes are additional details in your members' profiles. You can use them to distinguish between target groups beyond just access.
Two new field types have been added:
- Drop-down menu with fixed options: for example, “Level: Beginner / Advanced / Professional” or “Industry: Coaching / Retail / Agency”
- Date field: for example, “Program Start” or “Contract End”
Fixed options ensure consistent values so that your conditions work reliably. This eliminates typos and variations in spelling.
Note: If you delete an option later, members will retain their previous value. That value will then no longer match any rule. So be sure to think carefully about the options right from the start.
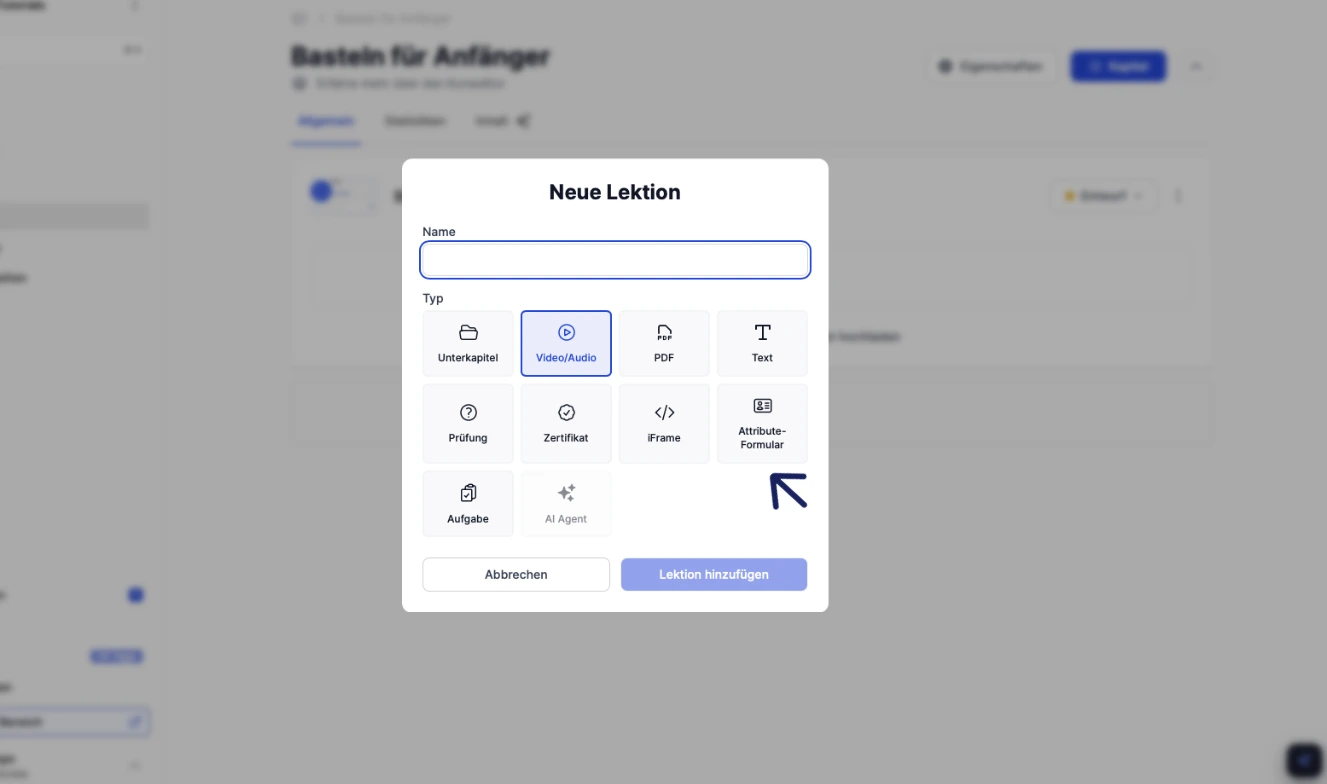
The Attribute Form as a Lesson
To avoid having to manage attributes yourself, you can include an attribute form as a lesson in a course. Your members can enter their information there themselves—for example, right in the first lesson of your onboarding course. You select the attributes to be requested and specify which ones are required fields.
As soon as a member saves the form, the information is stored in their profile and the appropriate rules take effect. The member will see the change the next time they visit the portal—all they need to do is refresh the page. Here’s how you can combine onboarding and personalization in a single step: The member answers a few questions, and the portal adapts accordingly.
When Multiple Sections Match: Exclusive Groups and Priorities
The more rules you create, the more often multiple sections will apply to a member at the same time. To ensure that only the correct version appears, group sections into exclusive groups. A member will see exactly one section from each group.
You decide which one it is: Use drag-and-drop to set the order. From top to bottom, the first section whose conditions match will be displayed. A section with no conditions at all serves as a fallback. It is automatically placed at the end of the group and appears when no other section matches.
Example: You have three welcome banners: a general one (with no conditions), one for Premium customers, and one for Premium customers with the "Advanced" level. To ensure that an Advanced Premium member sees the third banner, move it to the first position and the Premium banner to the second. The general banner remains at the end as a fallback. If the Premium banner were at the very top, it would be the first one to match the Advanced member’s level and would push the third banner out of view.
Rule of thumb: Place the most specific option at the top and the most general one at the bottom.
The portal reviews sections that do not belong to any group on a case-by-case basis. Different groups do not influence one another.
More Fine-Tuning for Your Portal
In addition to personalization, we’ve also been working on the design:
- Banners for desktop and mobile: You can upload an additional image for smartphones and switch between desktop and mobile views in the preview. If no mobile image is provided, the desktop image will be used. No more cropped text on mobile devices.
- Portal icons in the side menu: The icons you select for your portals now also appear in the side menu. This helps you find your way around, especially if you use multiple portals.
From a member's perspective: a portal that thinks for itself
Personalization remains invisible to your members, and that's exactly what makes it so effective. They log in and see a home page tailored to them: the right courses, relevant tips, and personalized offers.
If anything changes—for example, if a member books a new offer or specifies a new level in the attribute form—that change will be reflected the next time you access the portal. You don't need to update anything manually.
When Personalized Portals Are Worth It
Use the visibility rules whenever your members have different needs. For example, if you
- If you want to cater to beginners and advanced learners differently
- You want to show customers their own content or upgrade notifications based on the plan they've booked
- You want to display content based on a personal date, such as when a member first logs in
- During onboarding, use an attribute form to determine where someone stands, and then tailor the portal accordingly
- want to consolidate multiple target audiences into a single portal instead of maintaining multiple portals
Our recommendation: Start with a single distinction—for example, beginners and advanced learners—and build from there. The clearer your target groups are, the simpler your rules will remain.
Do you have feedback or would you like to suggest additional features? If so, feel free to use the Ideas Board in the Memberspot Community. There, you can submit feature requests and upvote suggestions from other users. To view the community, you must first log in or register.



%201%20(1).png)