
The portal is the first thing your members see after logging in. And for most of them, it looks like this: empty, or a default layout thrown together in a hurry. That’s wasted potential.
In a nutshell
- The homepage of your member area — fully customizable using drag-and-drop widgets
- Different widget types: text, images & content, and links
- Native AI Portal Builder (Scale and above) — plans the structure, suggests widgets, and populates content, all directly within the editor
- Custom portals available for each member (Scale plan and above)
- Ready-made templates to get you started quickly
Why the portal is important
Your members log in and make a decision: Do I stay, or do I click away? The portal determines whether they feel guided or lost. Whether they know what’s next—or whether they’re aimlessly scrolling through courses.
A good portal isn't just for show. It's a guide.
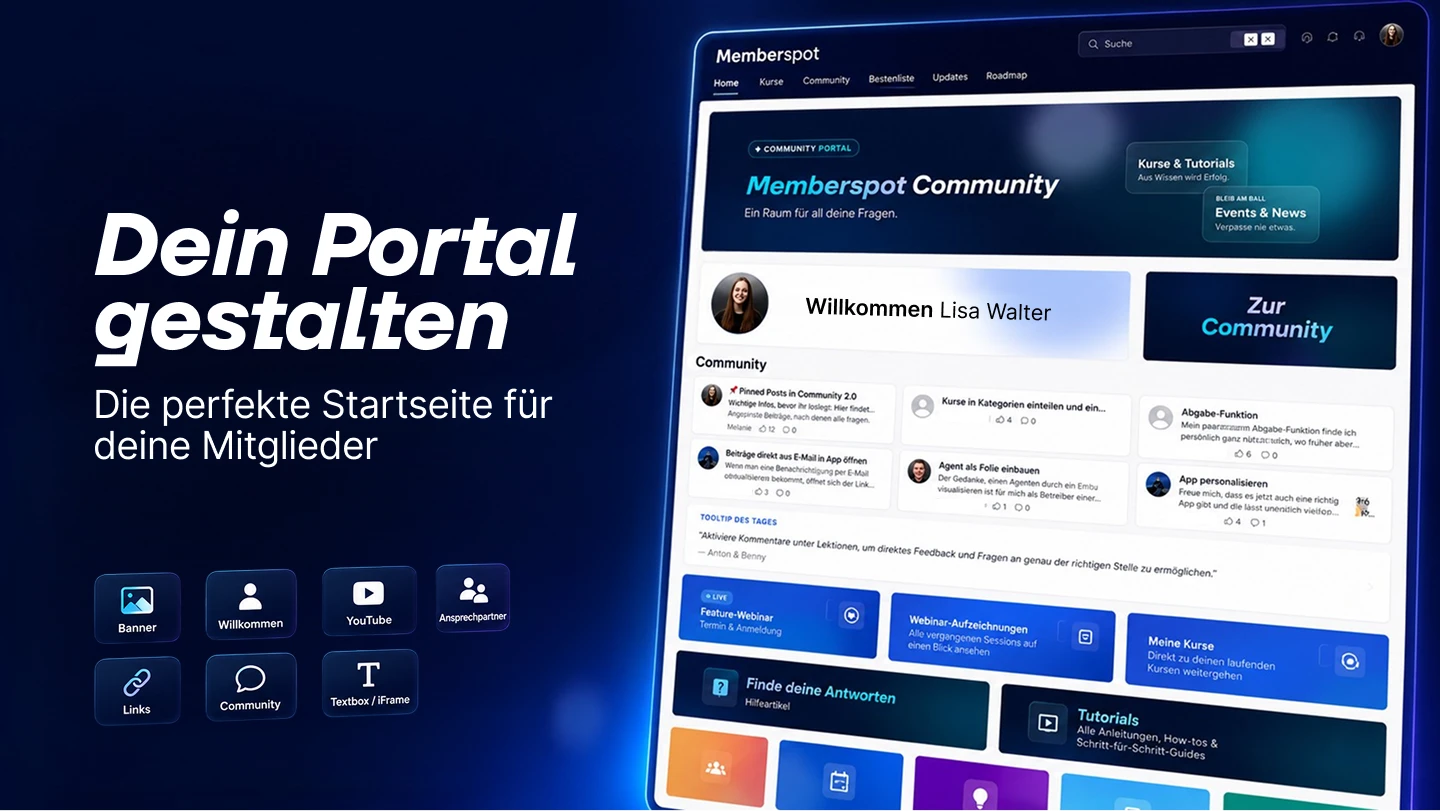
Your building blocks: Widgets, freely combinable
In the editor, the widgets are organized into two groups: Text, Images & Content and Links.
Text, Images & Content
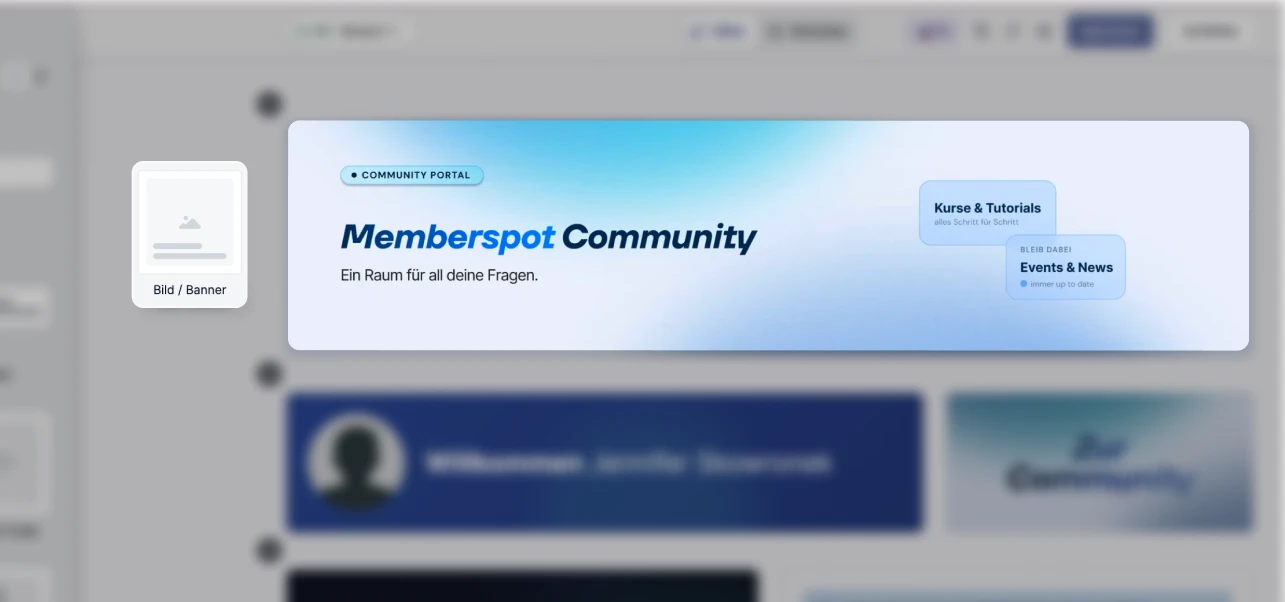
Image / Banner — An image with a title, subtitle, and optional link. You can darken the image, choose the text position, and link to internal or external pages. It serves as a visual introduction, announcement, or clickable CTA.
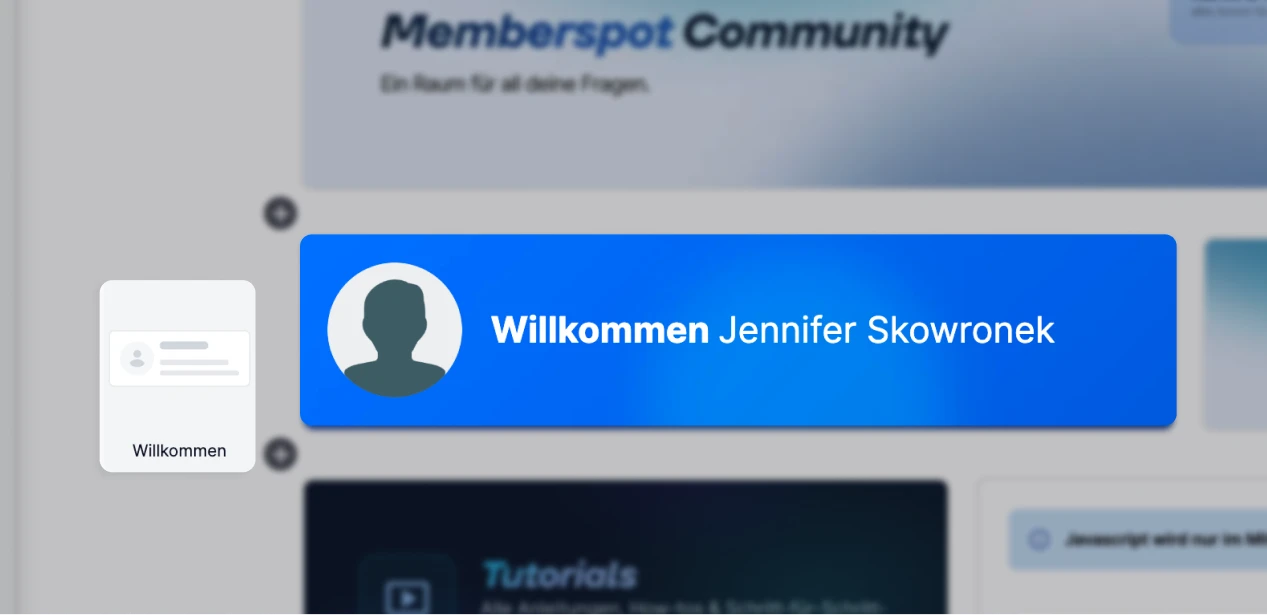
Welcome — Automatically displays the name and profile picture of the logged-in member. It may seem like a small thing, but it makes a difference: your member feels recognized.
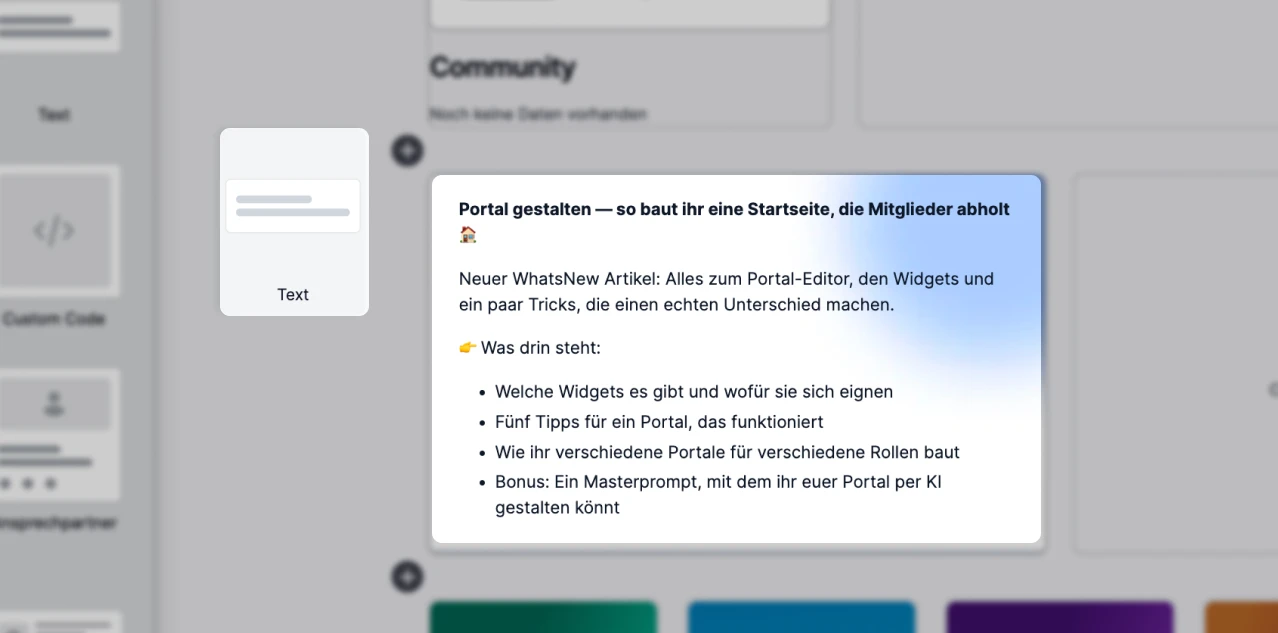
Text — Free-form text with formatting, images, and a background image. Ideal for explanations, notes, or a short welcome message.
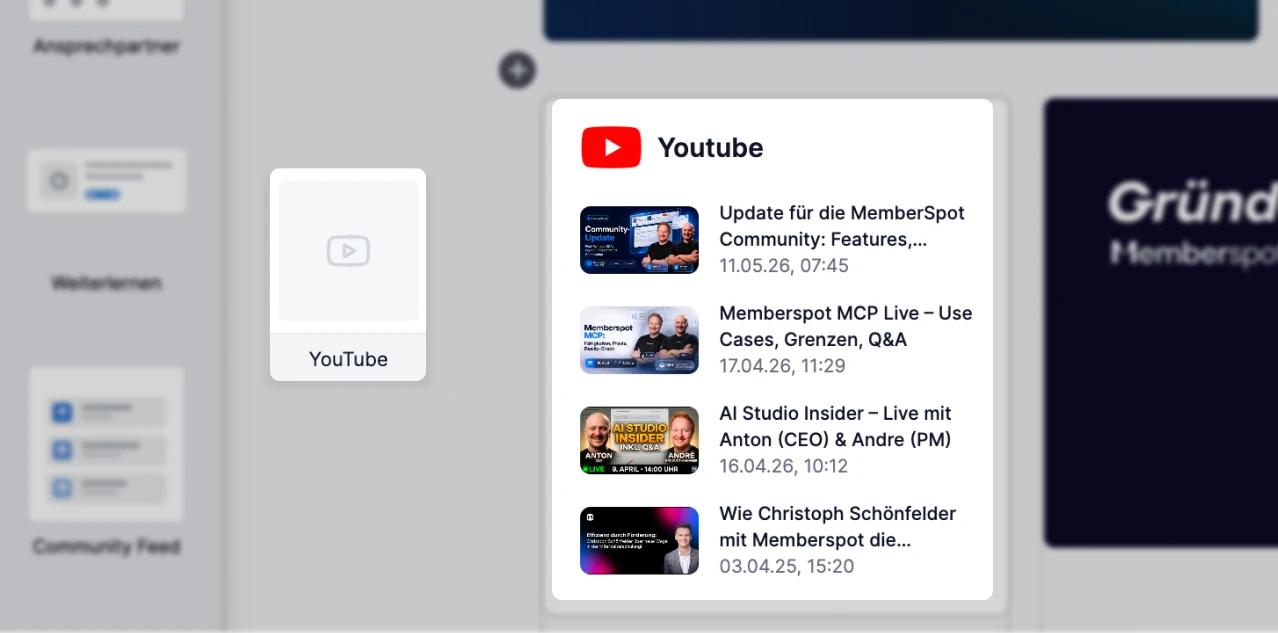
YouTube — Embed your channel directly. You choose how many videos to display.
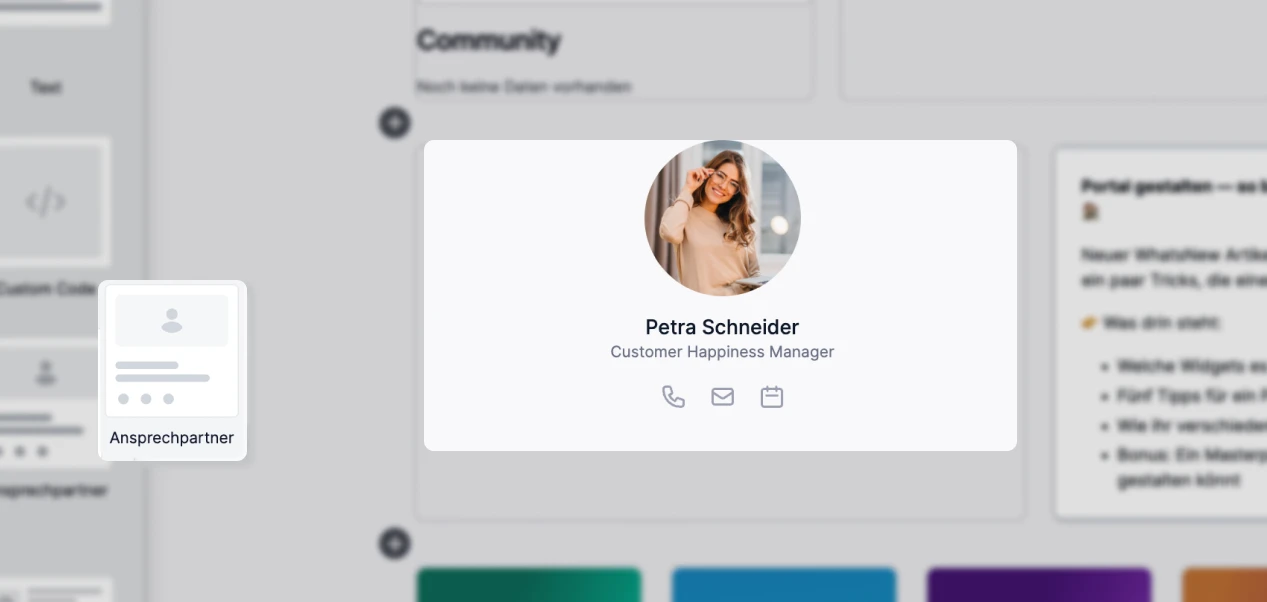
Contact Person — Profile picture, name, text, and links. Show your members who’s there for them — as a contact card, team introduction, or coach profile. Available in two versions: with a square or round profile picture.
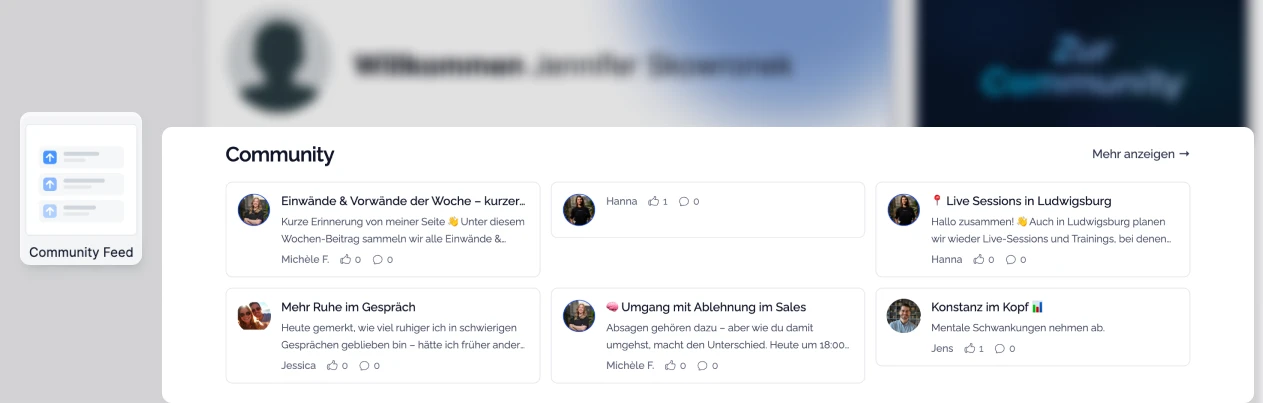
Community Feed — Displays the latest posts directly on the portal. After logging in, your members can immediately see what's currently being discussed.
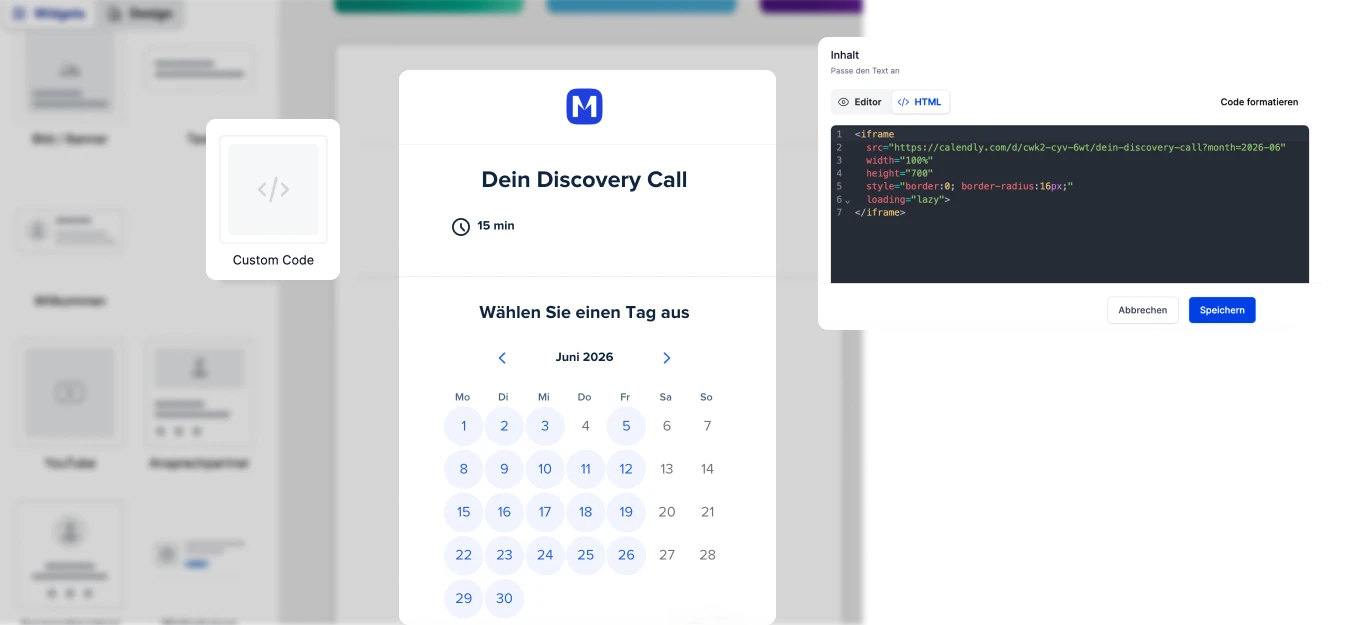
Custom Code/IFrame — Your own HTML or embed code directly within the portal. Here, you can incorporate dynamic content—for example, a "Tooltip of the Day" widget that updates automatically every day.
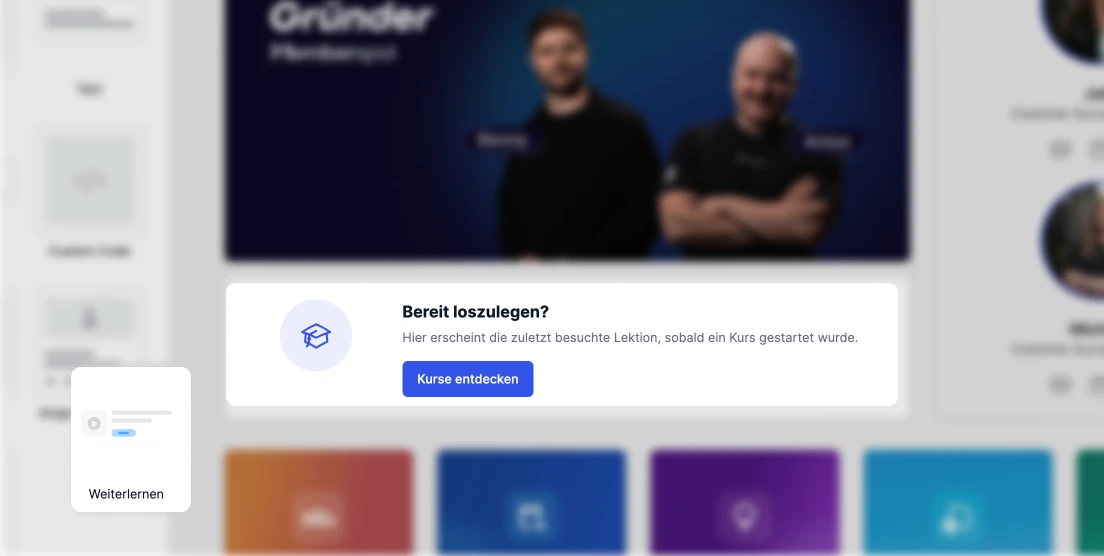
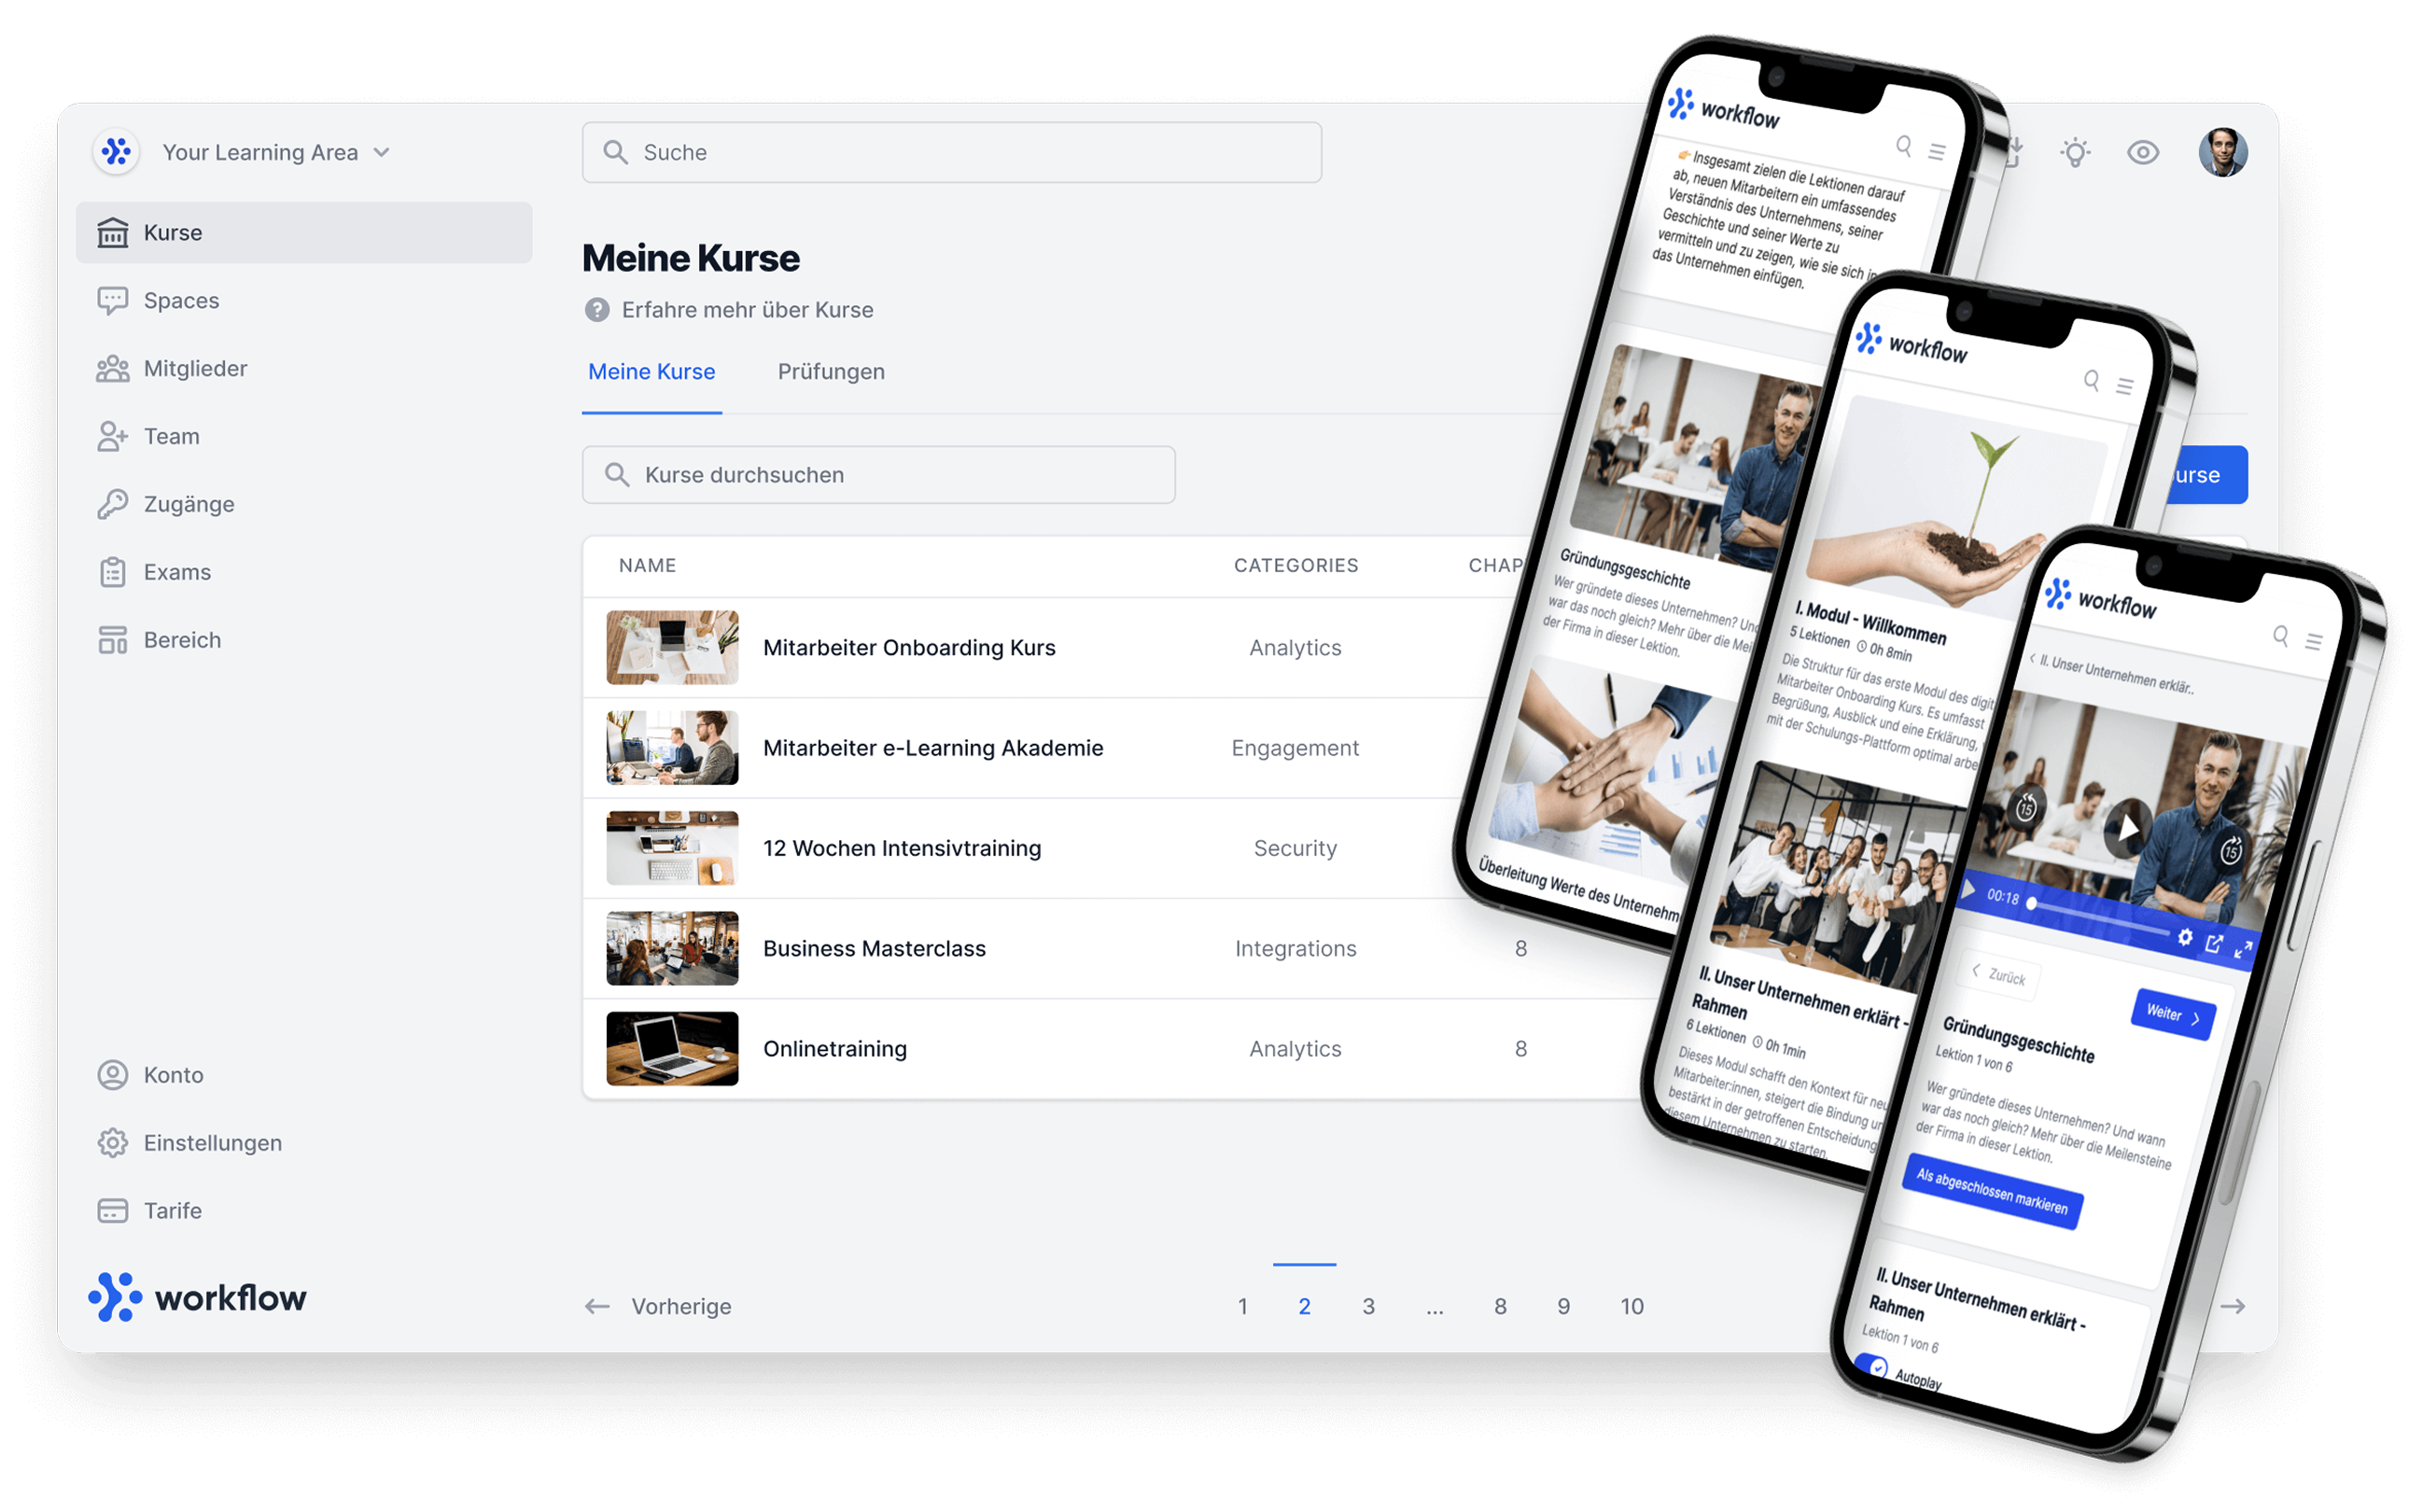
Continue Learning — Shows the most recently viewed courses, including progress. Your members can see exactly where to pick up right after logging in—no searching, no scrolling. One of the most important navigation widgets there is.
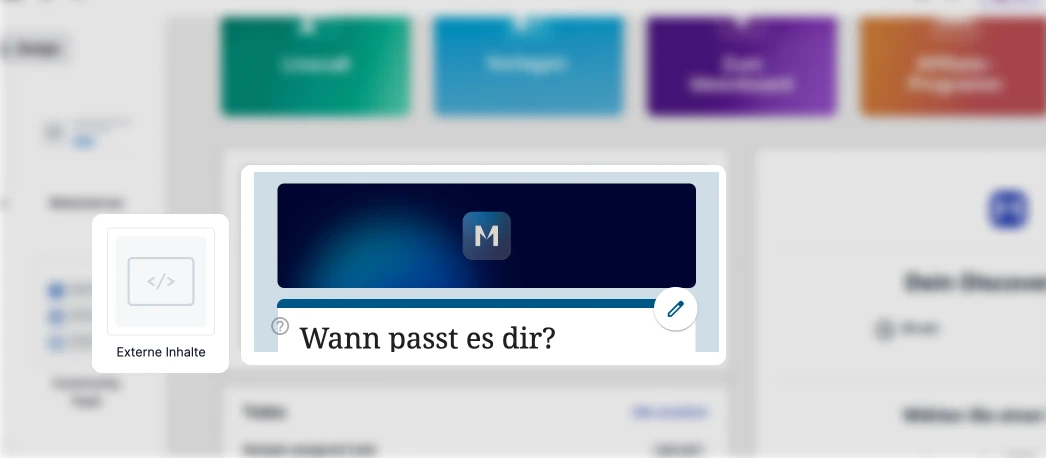
External content — Embeds external content, such as videos from Vimeo or Wistia, or other web content. (Please double-check the exact distinction from custom code — see note to the editorial team.)
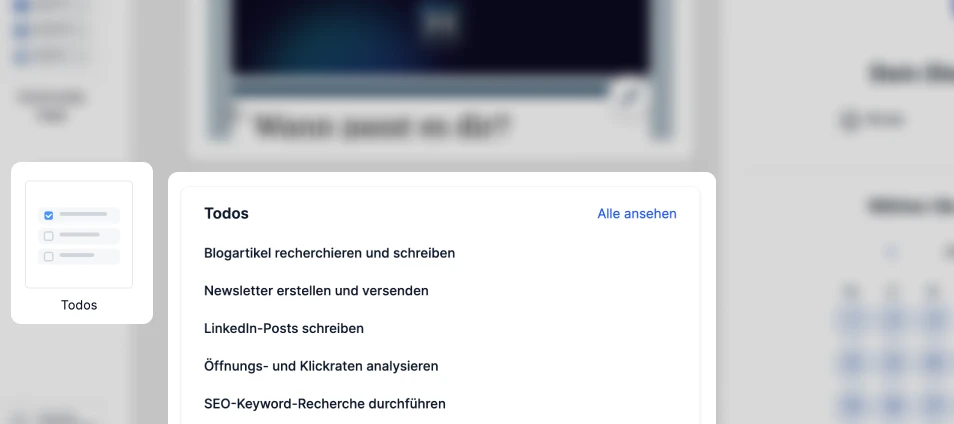
Todos — Task or checklist widget, e.g., for onboarding steps or a member’s next to-dos. (Please double-check the exact functionality.)
Links — Links to internal or external content. Ideal for quick access to items such as "Current rates" or "Support." Available in four versions:
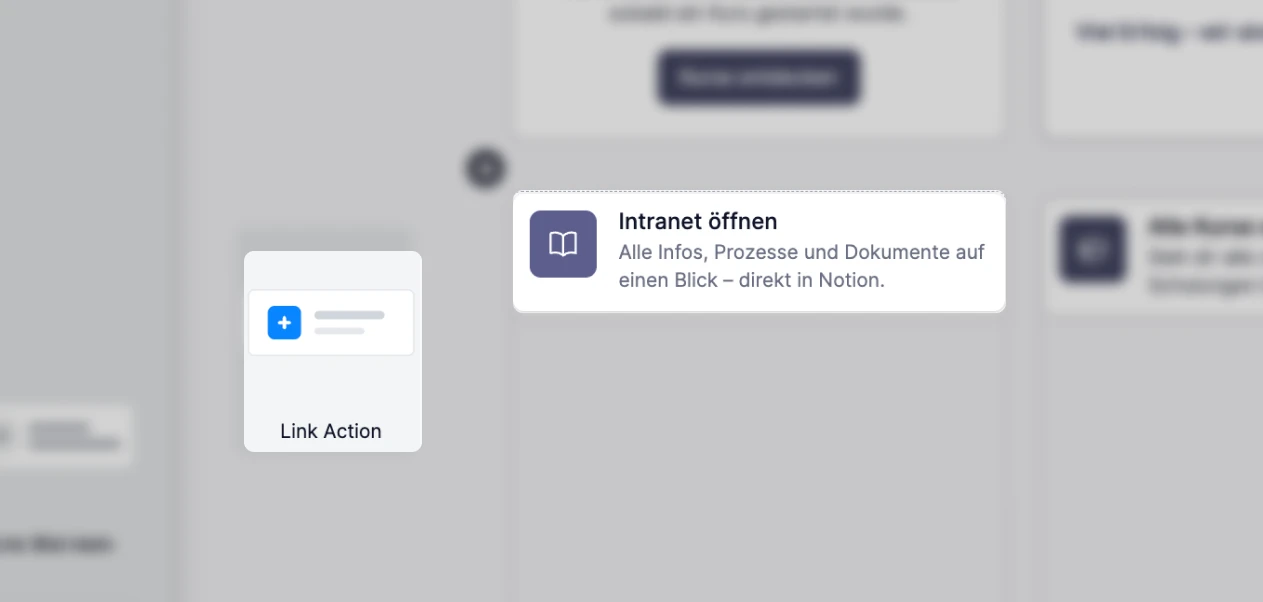
Link Action — eye-catching action/button link for the most important action
Small image link — compact link with a small image

Link with large image — large link with prominent image
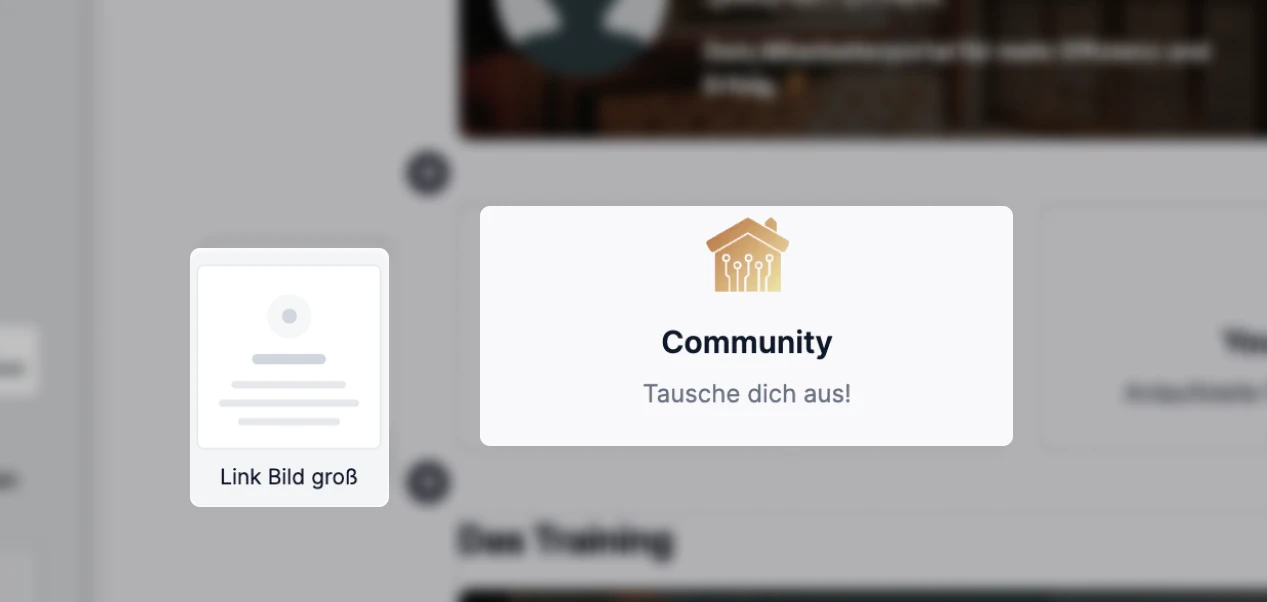
Link Card — Link as a card

Five Tips for a Portal That Works
1. Make your contact person visible. Show right away who’s there. A face, a name, a link to contact information. Members who know who to turn to are more likely to stay.
2. Use the banner as a call to action, not just as decoration. “New course available” with a direct link. “Live call on Thursday” with a sign-up link. The banner is the first thing people notice—take advantage of that.
3. Less is more: A welcome message, a banner, a point of contact, and two or three links. Packing everything onto the home page overwhelms visitors instead of helping them find their way around.
4. Different portals for different roles Starting with Scale, you can assign individual portals to each member. New customers and regular customers see different homepages—on the same platform.
5. Update regularly New course, upcoming event, current focus—change the banner regularly. A website that’s looked the same for months feels dead.
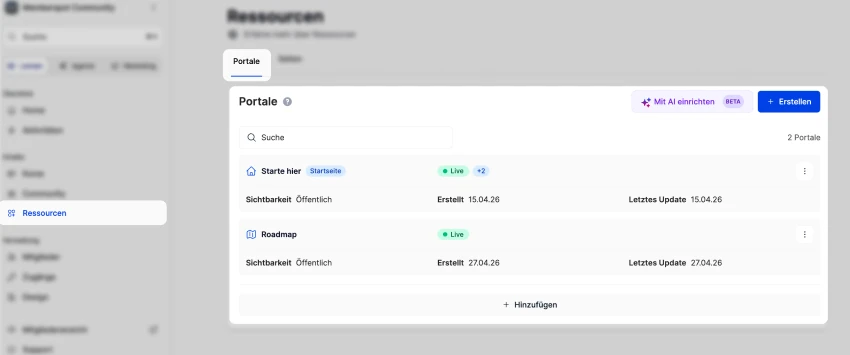
Here's how to set it up
Contents → Customers & Portals → Add Portal → Choose a template or start from scratch → Assemble widgets using drag & drop → Save.
There is no automatic saving—this is by design. You can experiment without accidentally changing a live portal.
Portal as the home page: Design → Home Page → Select Portal. Portal in the menu: Menu → Menu Item → Link Portal. Custom portal for each member (Scale and above): Members → Users → Settings → Portals.
Bonus: How to design your portal with the AI Portal Builder
No designer? No problem. With the AI Portal Builder (available in the Scale plan and above), you can quickly structure, design, and populate a portal with dynamic content.
Plan the structure — Describe what you want to include on your portal: banners, welcome page, courses, YouTube videos, contact information, webinar dates, lead magnets. The AI Portal Builder uses this information to create a page structure as a visual wireframe — ready to use as a template.
Creating tile graphics — To ensure consistent visuals, have image prompts written for you: for example, Glassmorphism style, a consistent color scheme, one prompt per tile. All in the same style, all generated at once.
Custom Code Widgets — Take the "Tip of the Day" widget, for example: A different tip every day — it changes automatically, so no manual updates are needed. Just paste the custom code into the iFrame widget, and you're done.
The workflow is simple:
- Describe whatever you want
- Let the system suggest a structure for you
- Generate consistent graphics
- Build custom widgets for dynamic content.
After that, the portal will no longer feel like a default setup, but like your own product.
🎁 Here exclusively for you: Your master prompt for your own member portal
Is the portal not activated yet? If so, check out this help article.
Your portal is the first thing your members see. Make the most of it.


.jpg)

%201%20(1)%20(1).png)
