Four features that will make a real difference to your community. Gamification and Q&A Spaces are brand-new—post formats and layouts have recently gone live. Here’s the complete overview.
In a nutshell
- Gamification automatically rewards engagement—with points, levels, streaks, badges, and leaderboards
- Q&A Spaces help organize questions and feedback—with appropriate statuses
- New post formats: events, polls, galleries, videos, and CTA buttons right in the post
- Two community layouts: a sleek single-column layout or an expanded two-column layout with a sidebar and sections
Gamification: Making Activity Visible
Let's be honest: Most members are reading along. Posting? Commenting? Very few do that voluntarily. Gamification isn't about making things mandatory—it's about visibility. Those who participate see it. And those who see it want more.
Every activity automatically earns you points. Comments are worth twice as much as reactions—after all, writing is more than just clicking. The daily limit is 50 points. Liking your own posts doesn't count until someone asks.
Points turn into levels. When you activate the feature, you choose a preset—Small, Medium, or Large—depending on how fast you want to progress. You can customize the level names, but the thresholds remain fixed. And every time you level up: a notification plus a celebration modal. No quietly creeping up the ranks.
Streaks show who’s really there every day. Current streak and personal record—both are visible. Missed a day? The streak resets to 1.
The leaderboard does the rest. Who's in the lead—this week, this month, or overall? There are three time frames; you choose which ones are active. Every member always sees their rank at the top—whether it's 3rd place or 312th.

Here's how to set it up in 2 minutes:
Admin → Community → Settings → Enable Gamification → Select Preset → Enable Leaderboard → Save. Do this once, and everything will run automatically after that. Learn more here: Help article.
Badges — show who's getting involved
Badges make engagement visible—on your profile, for everyone.
Level badges work completely automatically. When a member reaches a certain point threshold, the badge appears. There are up to 9 levels, and the badge updates automatically as the member advances. You don't have to do a thing.
You can award recognition badges yourself. For people who stand out—special contributions, completed challenges, important roles. You can optionally set an expiration date if the award is only meant to be valid for a certain period of time.
Members can pin their favorite badges to their profile. These appear as small circles on the profile card; hover over them to see the rest. For more information, see the help article.

Q&A Spaces: Your community has a say
Until now, every Space was a feed. Ideas, questions, suggestions—everything got lost in the mix. If you wanted to know what topics the community was really interested in, you had to guess.
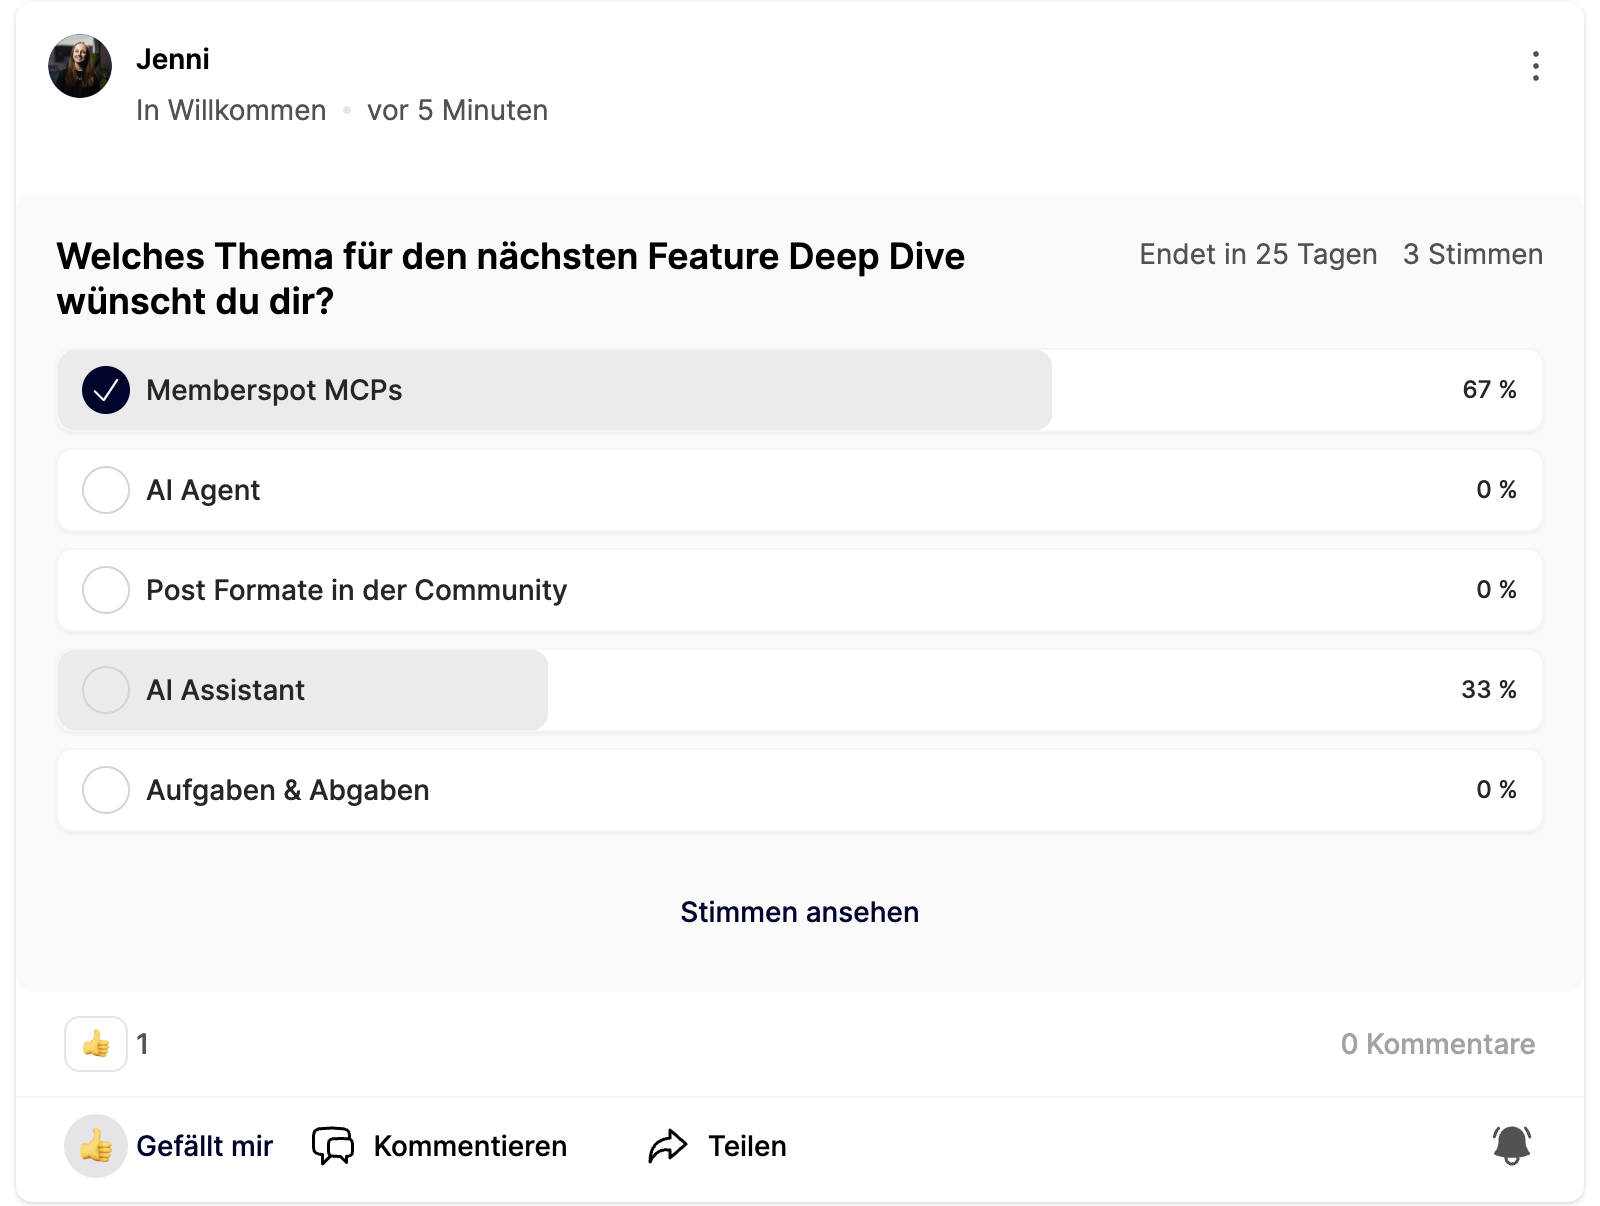
Q&A Spaces change that. Members can suggest topics—such as a topic for the next webinar or a feature idea—and others vote on them. The topics that interest the community rise to the top. You can see right away what’s relevant.
Each post is assigned a status. There are three templates available:
Q&A — Open, Resolved, Duplicate, Spam. The author marks the question as answered once it’s been addressed. Does one of your participants have a question about applying what they learned after a lesson? Instead of sending you a DM, they post it in the Q&A Space. Others with the same question can see right away that it’s already been answered. You answer once, not ten times.
Feedback — Open, Planned, In Progress, Implemented, Rejected, Duplicate, Spam. Your members have ideas—new course topics, missing features, suggestions for improvement. They post, others upvote. You set the status to “Planned” or “In Progress”—and everyone sees that something is happening. What doesn’t happen is marked as “Rejected”—transparently, without discussion across three channels.
Blank template — Completely empty. You define your own statuses and build your workflow from scratch. For example: Members suggest topics for the next live meeting. Custom statuses: “Suggested,” “On the agenda,” “Discussed.” Before each call, you can immediately see what’s on the community’s mind—sorted by votes.

Set up the Space in your community now:
Admin → Community → Spaces → Space Settings → Select post type → Select template → Save.
Post Formats — What Posts Can Do Now
Posts now support 5 formats: events, polls, galleries, videos, and CTA buttons. You decide which ones are available in each space—separately for moderators and members.
Event posts appear in the feed with a calendar badge, are automatically added to the pinned post carousel, and can be filtered specifically. No separate channel or second announcement is needed.
Surveys run directly within the post—anonymously, publicly, or visible only to admins. CTA buttons link to external URLs without you having to go to the trouble of explaining it in the text.
You can find out how to set up and use these formats in our help articles and in our "What's New" article.
Community Layout — Focus or Overview
Three spaces require a different structure than fifteen. That's why there are now two layouts.
1-column layout — centered, no sidebar. Clean, fast, and focused on the feed. Perfect if you want to keep things simple.
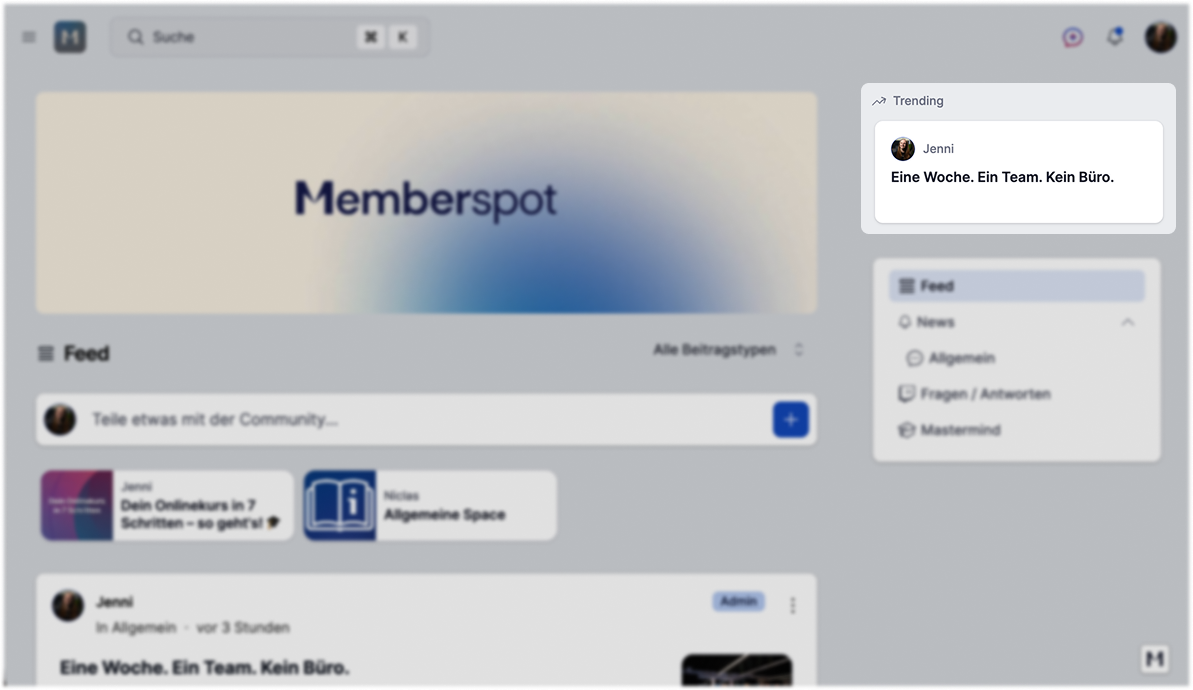
2-column layout — with a sidebar on the right: Spaces, Trending Posts, Unread Counter, Gamification Progress. Plus sections for thematic groups and a cover image as a banner at the top. Ideal as your community grows and needs more guidance.
Sections are the real game-changer here. You can group Spaces into sections—such as "Course Content," "Discussions," and "Announcements"—and move them around using drag-and-drop. Available only in the 2-column layout.
You can find out how and where to use the new layout in your community in our help article and our What's New article.

You shouldn't miss this either
In addition to the major features, there are a few smaller updates that make a real difference in everyday use.
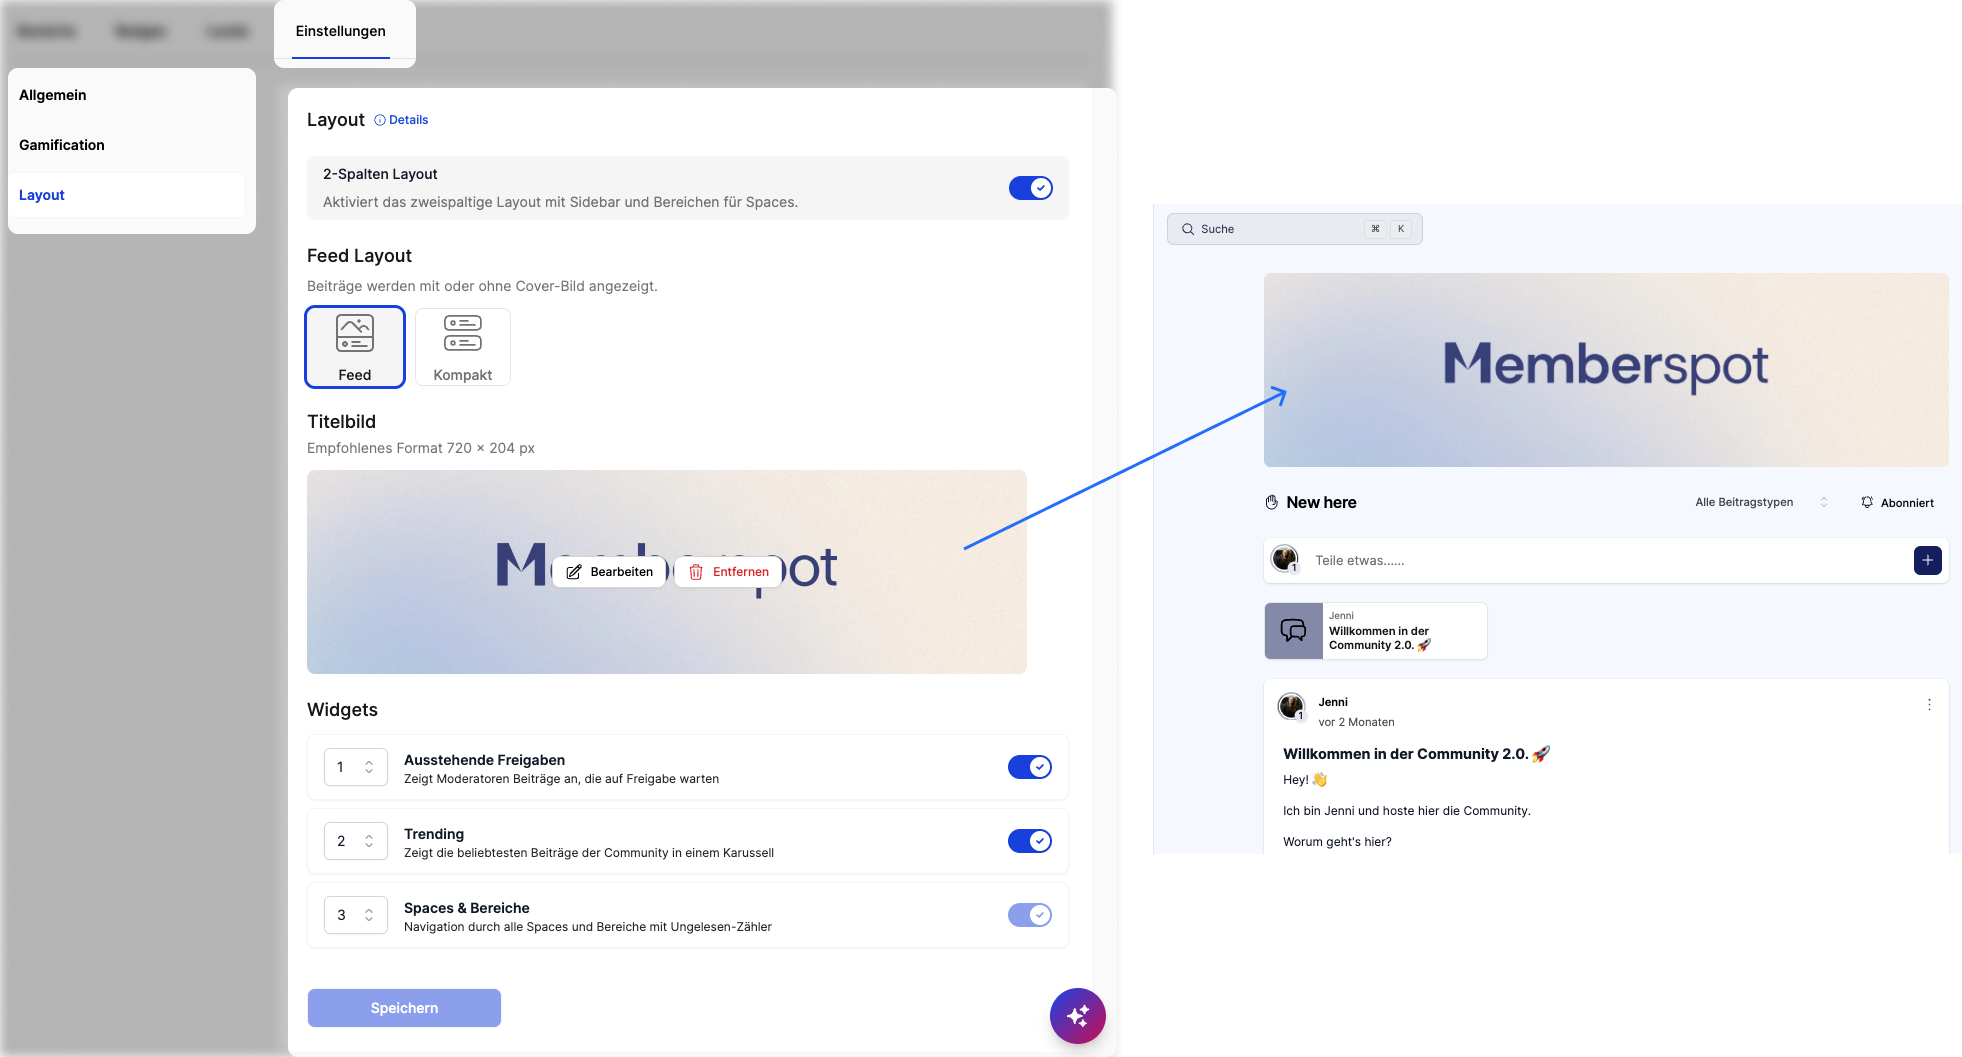
Cover image for the community
The entire community gets its own cover image as a banner. It sets the visual tone and gives your community a face—instead of just a plain headline.
You can find this setting in the admin area under Community → Layout.
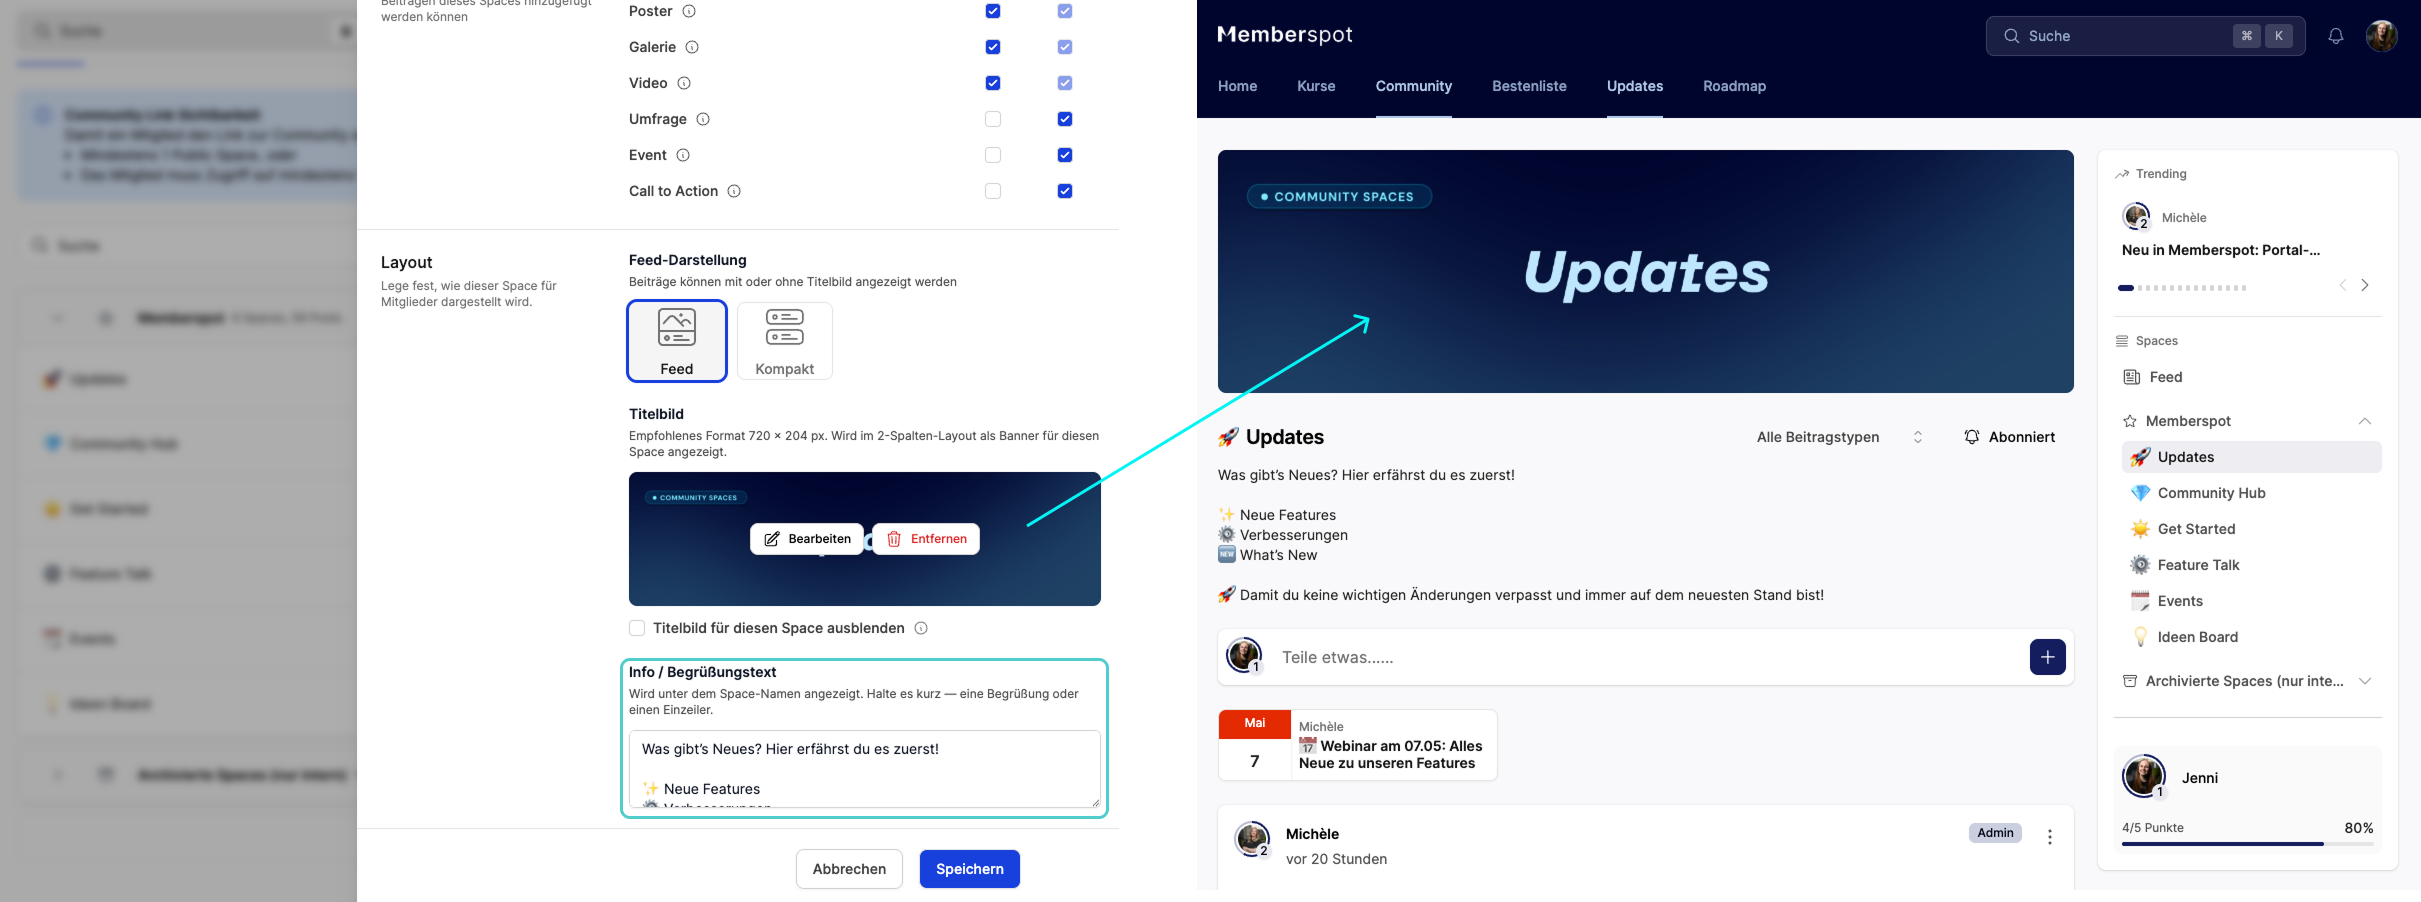
Cover images and descriptions for each space
Each Space can now have its own cover photo and description. Your members can immediately see what a Space is about—before they read the first post. This is especially helpful if you have many Spaces and want new members to get their bearings quickly.
Change the cover photos and descriptions of your Spaces in the settings for each Space in the admin area.
Trending Posts
The Trending Widget automatically displays the posts with the most engagement. Your members can see at a glance what’s trending in the community—without having to scroll through the feed. In the two-column layout, it appears directly in the sidebar, always visible.
Community widget on the portal
The portal now features a widget displaying the latest community posts. Your members can see what’s being discussed right after they log in—without having to navigate to the community first. This draws in people who otherwise would never visit.
.png)
Your community should feel like a place where things are happening. Not like a silent feed where posts just disappear down the page.
Have fun testing it out! 🚀